
“I do have a script and some graphics for a sync-heavy 'one’screener. […] You know you want to 🙂” Optic
There are times when I write demos and intros for myself, and there are times I write them for others.
So this is about a guest project for Planet Jazz under the lead of Optic. I think it is one of our most sophisticated intros so far with much work spent on design and small details.
The Amiga always has been about creativity and finding creative solutions. I hope you will take some inspiration from these lines.
The stuff here is mainly aimed at Amiga coders, but other people are also quite welcome to take a dip into the gory details of advanced Amiga coding. If things are not clear or explained too briefly, please send me an email (chrisly at platon42.de) and I will try to rework some of it.
You can download the intro here as ZIP (including an ADF file).
While I do not log into Pouet and comment there any longer, I want to thank you for all the feedback you gave us on the intro there.
“I like!” AntDude
There are also write-ups for HAM Eager and HAMazing if you missed those.
The music by mA2E is based on AmigaKlang samples by Virgill, and there’s 182 KB of samples to be generated. This takes quite a while.
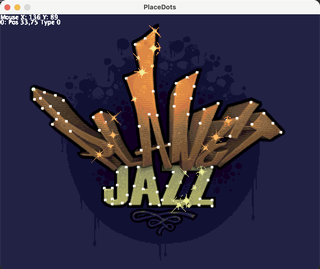
With Frustro I introduced a precalc animation on the AmigaDOS screen while rendering the music samples. Gladly, Optic drew this sweet eight cell animation for me, so we didn’t have to look at a boring progress bar.
On a hires screen, it is well proportioned. Too bad that Slash’s YT video capture doesn’t include the precalc screen, but thanks for the capture, Slash!
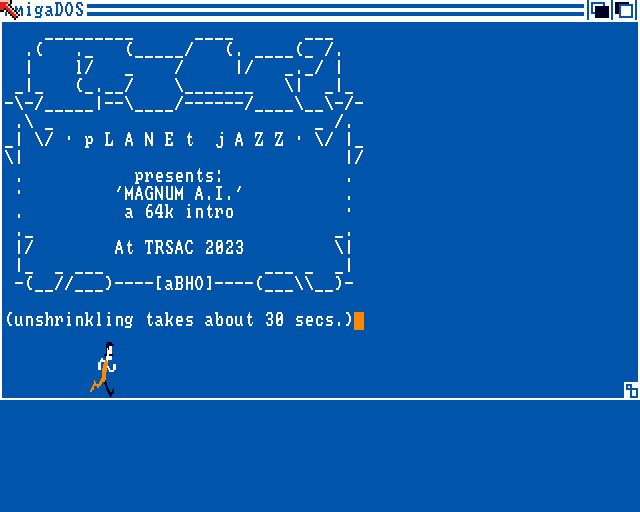
The fine ANSI art is also by Optic and included inside the compressed binary.
![]()
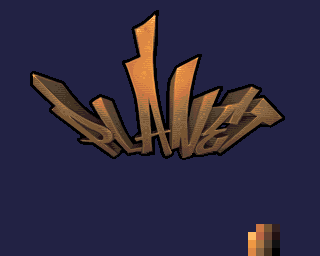
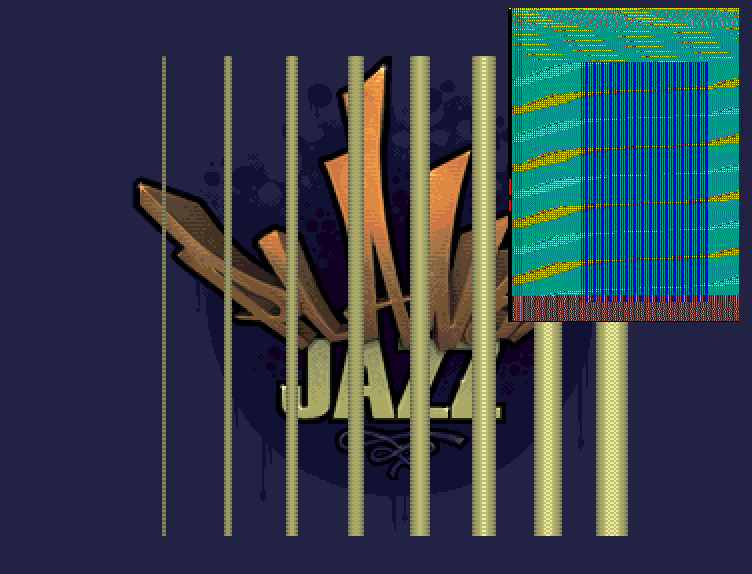
Optic provided me with this nice 32 colours logo (that’s how gfx artists usually send in the gfx with the palette
in random order as seen in these two blocks of 16 colours in the bottom right).
It is almost 256x240 pixels but unfortunately, it’s not aligned at a 16 pixels grid (see yellow lines) – by three pixels.
No one would probably ever have noticed that it
is off by a couple of pixels, but I wanted to stay true to the artist and used the bplcon1 scroll
register with $00dd to get it to the original position. Sigh. If I knew before that this would cause more
trouble later…
Optic wrote in the storyboard: “Logo appears. Some kind of snazzy effect. Partial to blinds, but coders choice.”
Snazzy effect? I’m all in! Why not recycle some routine from prior intros? Because it’s 32 colours, and it’s too big to store pre-shifted versions to do something like in Waffles of Math Construction.
Also, wouldn’t it be nice, if the circle in the background was static when the logo appears? But there’s no way to go down to 7 colours and dual playfield with this fine logo gfx.
But maybe we can go down to about 16 colours if we skip the “Jazz” part of the logo? Let’s try and rearrange the palette.
![]()
That sorting puts in almost all the required colours for the “Planet” part in the first 16 colours. Almost as there are some bright pixels and the circle and antialiasing that is still the upper part. I guess you didn’t notice :)
In a minor effort I remapped the remaining pixels and tried to reconstruct the bottom black outline which was not present in the original image:
Sweet. Now we only need to blit four bitplanes for the top part at 256x160 pixels and can clear the screen instead of needing to restore the background by copying from some backup image.
Most graphics are stored as chunky images on disk, as this is more efficient for compression. But storing two full images in memory we would waste a lot of disk space. Instead, we store the 16 colours version normally and for the 32 colours version we only keep the differences by xor’ing with 16 colours one. Here’s how it looks on disk before undoing the xor operation:

During runtime, the code walks the logo and finds non-empty 16x16 pixel blocks and records them to a data structure storing its positions. Then the resulting 94 blocks are just moved with the blitter and linear interpolation. Because most of the blocks are largely overlapping, the screen is mapped into 16x10 blocks and when blitting into the screen, these blocks are marked dirty (using bits in a word) and for clearing, only those areas that were dirty are cleared with the blitter.
This all adds up to the effect running in one frame.
As it looked boring to just have 16x16 blocks moving across the screen, the bplcon1 scroll register is used
to wiggle/wobble the image horizontally (and distort it for a split second sync’ed to the music). As the target
position is 0x00dd, the wiggle will center around 0x0088 in the beginning to be able to move left and
right equally and slowly move to 0x00dd as the wiggling gets less.
However, we did not solve the problem of having the static background image. Sprites would be ideal because they are not affected by the scroll register we used for the wobble. The circle is about 200 pixels wide and that’s at least 72 pixels too wide for using standard three colour sprites for it (the circle and inner ornaments (“squiggles”)) only use three colours incl. background, so that would be ideal!).
We won’t give up here.
Instead, we remind ourselves that there were demos and games that used a full screen sprite layer.
We can create one monochrome sprite plane by loading and repositioning a sprite while racing the raster beam with
the copper. This works by writing sprpos and sprdatB (or sprdata) alternating, so we can generate 16 pixels
worth of data every two copper commands, which is perfectly in sync because with four bitplanes enabled, the copper
still operates at eight pixels per command (with 32 colours, it’s twelve pixels, so it wouldn’t have worked).
So having a monochrome sprite plane would be possible, and we could have stopped here.
But our circle has TWO colours due to the darker squiggles inside. Is there a way we can have both colours?
We cannot update the position or one word of data of more than ONE sprite with the copper, but we can decide to update the position of a second sprite and data for the inner squiggle. This, however, works only if at no given 16 pixel span, we are changing more than from background to circle OR from circle to squiggle.
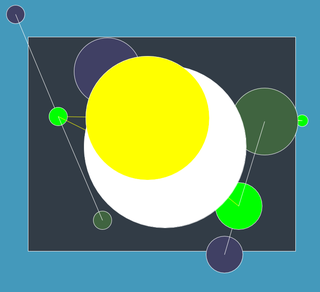
This might be a bit hard to understand, so let’s look at the output of a copperlist that I generated using a prototyping program:
![]()
As it turns out, Optic incidentally drew the graphics with this restriction, except for a few pixels that I just killed in the process.
So what you can see here is a monochrome bitplane (with some random memory data) and two sprites:
The monochrome black circle sprite with sprdata fixed to $0000 producing transparent and colour 18,
and the second sprite for the squiggle with sprdatB fixed to $ffff producing colour 17 and 19.
By setting colour 17 and 18 to the same value, we won’t notice anything fancy here. Magic.
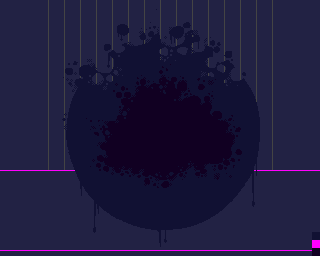
In the intro, the sprite copperlist is only stored for the top 160 lines (which already takes about 14 KB uncompressed!) and below, it’s switching to a four colour display that is stored as planar bitplanes (that’s what’s marked in the picture above with magenta lines), leaving more DMA time for the blitter (after the copperlist does eat some DMA cycles).
Here’s an excerpt of the copperlist:
 0003de10: 0180 0224 ;  COLOR00 := 0x0224
 0003de14: 01a2 0113 ;  COLOR17 := 0x0113
 0003de18: 01a4 0113 ;  COLOR18 := 0x0113
 0003de1c: 01a6 0102 ;  COLOR19 := 0x0102
 0003de20: 0140 3600 ;  SPR0POS := 0x3600
 0003de24: 0142 3600 ;  SPR0CTL := 0x3600
 0003de28: 0144 0000 ;  SPR0DATA := 0x0000
 0003de2c: 0146 0000 ;  SPR0DATB := 0x0000
 0003de30: 0148 3600 ;  SPR1POS := 0x3600
 0003de34: 014a 3600 ;  SPR1CTL := 0x3600
 0003de38: 014c ffff ;  SPR1DATA := 0xffff
 0003de3c: 014e 0000 ;  SPR1DATB := 0x0000
 0003de40: 3607 fffe ;  Wait for vpos >= 0x36 and hpos >= 0x06
                     ;  VP 36, VE 7f; HP 06, HE fe; BFD 1
 0003de44: 0102 0044 ;  BPLCON1 := 0x0044
 0003de48: 3707 fffe ;  Wait for vpos >= 0x37 and hpos >= 0x06
                     ;  VP 37, VE 7f; HP 06, HE fe; BFD 1
 0003de4c: 0102 0055 ;  BPLCON1 := 0x0055
 0003de50: 3807 fffe ;  Wait for vpos >= 0x38 and hpos >= 0x06
                     ;  VP 38, VE 7f; HP 06, HE fe; BFD 1
 0003de54: 0102 0088 ;  BPLCON1 := 0x0088
 [...]
 0003eec0: 7907 fffe ;  Wait for vpos >= 0x79 and hpos >= 0x06
                     ;  VP 79, VE 7f; HP 06, HE fe; BFD 1
 0003eec4: 0102 00dd ;  BPLCON1 := 0x00dd
 0003eec8: 794f fffe ;  Wait for vpos >= 0x79 and hpos >= 0x4e
                     ;  VP 79, VE 7f; HP 4e, HE fe; BFD 1
 0003eecc: 0140 3658 ;  SPR0POS := 0x3658
 0003eed0: 0146 0001 ;  SPR0DATB := 0x0001
 0003eed4: 795f fffe ;  Wait for vpos >= 0x79 and hpos >= 0x5e
                     ;  VP 79, VE 7f; HP 5e, HE fe; BFD 1
 0003eed8: 0140 3668 ;  SPR0POS := 0x3668
 0003eedc: 0146 1ff0 ;  SPR0DATB := 0x1ff0
 0003eee0: 0140 3670 ;  SPR0POS := 0x3670
 0003eee4: 0146 01c0 ;  SPR0DATB := 0x01c0
 0003eee8: 0140 3678 ;  SPR0POS := 0x3678
 0003eeec: 0146 7fff ;  SPR0DATB := 0x7fff
 0003eef0: 0148 3680 ;  SPR1POS := 0x3680
 0003eef4: 014e 0040 ;  SPR1DATB := 0x0040
 0003eef8: 0148 3688 ;  SPR1POS := 0x3688
 0003eefc: 014e 8000 ;  SPR1DATB := 0x8000
 0003ef00: 0148 3690 ;  SPR1POS := 0x3690
 0003ef04: 014e 3c8f ;  SPR1DATB := 0x3c8f
 0003ef08: 0148 3698 ;  SPR1POS := 0x3698
 0003ef0c: 014e 0300 ;  SPR1DATB := 0x0300
 0003ef10: 0140 36a0 ;  SPR0POS := 0x36a0
 0003ef14: 0146 ffff ;  SPR0DATB := 0xffff
 0003ef18: 0140 36a8 ;  SPR0POS := 0x36a8
 0003ef1c: 0146 ffff ;  SPR0DATB := 0xffff
 0003ef20: 0140 36b0 ;  SPR0POS := 0x36b0
 0003ef24: 0146 f600 ;  SPR0DATB := 0xf600
 0003ef28: 7a07 fffe ;  Wait for vpos >= 0x7a and hpos >= 0x06
                     ;  VP 7a, VE 7f; HP 06, HE fe; BFD 1
There’s some more tiny bits in there to make sure skip unused areas by either waiting or writing NOPs and to remove any artifacts when there is a line without the sprite being used so that it doesn’t repeat itself downwards.
When the “Jazz” part appears, the original 32 colours screen is shown, but only until the ornament part, where it switches back to the four colour circle graphics.
In a last step, the ornament is also shown, fully presenting the bog-standard 32 colour graphics.
The circle needed some sort of transitioning in, it would look a bit strange being there present on the screen from the beginning.
So I wrote a prototyping tool to define 3D spline points to let the circle come from a distance to the final position on screen.
It uses four buffers and the last three buffers are reused to get some sort of lagging effect. That looked okay, but still a bit boring.
So there was this idea of having some sort of “underwater” bubbles, as the original circle ornament looks like it’s being dissolved by bubbles at the top.
24 circles of different sizes are precalculated and stored in a buffer, so they could just be blitted onto the screen. No clearing is needed because the filling operation of the main circle is overwriting the whole bitplane and bubbles will be just added on top of it.

The bubbles are seeded from a few bigger circles that are slowly decreasing in size, moving upwards with some random horizontal movement. With a certain probability, a bubble may split into two smaller bubbles. At a certain size these become single dots, but due to the lagging effect, these appear to be many more than there actually are drawn in every frame. Up to 96 of these bubbles (of whatever size) are handled during the scene.
Just before the main circle reaches the final position, a bunch of subtractive bubbles are drawn so the change to Optic’s graphics is not as hard.
As an 80s style effect, I wanted to have a shiny diagonal bar moving through the black outline of the logo. However, as we have a 32 colours screen, blitting the whole screen through a mask to update the outline is not an option as it would never run within one frame - especially not with the highlight-twinkles being drawn here at the same time.
But you as you watch the intro, you will notice it has been done. How so?
Well, like so often, the answer is: sprites. How can we make the sprites go into the black area? Sprites can be either be in the foreground of a playfield or behind a playfield. ‘Behind’ a playfield means, that the sprite will appear only where the background colour 0 would be normally appear. Unfortunately, the black outline is not the background colour of the logo picture.
But why not swap the background colour 0 with the black colour with index 15? Because then, the border around the graphics will suddenly be black and the magician would reveal his trick.
Fortunately, this is something we can fix by switching the border colour just after the image started on the left edge. We will need a little more horizontal raster time for the copper to swap colours before the image starts and ends, so at this stage, the screen needs to be extended by 16 pixels to the left and right each.
To exchange colour 0 and 15, we need to
or all bitplanes and use the inverse as maskand all bitplanes except the lastxored with the mask to invert the indexes 0 and 15Here’s an image with the sprite priority switched, so it goes in front of the image instead of going “behind”.

We will use all eight sprites to get a bar that’s 128 pixels wide, but just having a vertical bar would look a little poor. Therefore, we use the copper to change the horizontal position every line. The cpu is used to fill the copper list with the precalculated position data (using the blitter would have been too much overhead).
Two sprites each share the same three colours palette of the upper 16 colours. If you look at the palette in the pictures above, we have the yellow gradient there, and it is ordered in a way that each sprite can use the “right” set of colours. The gradient isn’t quite evenly spaced if you have to pick three colours for two sprites, so every second sprite uses a dithered colour to compensate.
You might have missed the use of sprites on the DMA monitor in this scene. This is due to the fact that sprite DMA is disabled as the sprite data is static and thus will not show up in WinUAE.
As icing on the cake, I wanted to have some twinkles on the logo while the shine effect wanders through. We have a lot of DMA time left, so why not?
Thankfully, Optic delivered this animation:

There are four different shades of twinkle animations that are generated at run-time from the same chunky pixel data.
(Later, the twinkles are reused for blinking teeth effect on the Magnum A.I. title screen.)
I again quickly wrote a tool to write out the twinkle positions on the logo:
We don’t have enough memory to use double buffering here (we are using an enlarged, remapped copy of the original logo, but we need to keep the original for the blinds effect later!). To avoid visible corruption, the 13 twinkle bobs are drawn in the vertical blank region and the image is restored after the raster beam has left the area where the twinkle happens.
Putting it all together:

Optic suggested to use blind as transition effect, who would I be to not follow his ideas?
There are several ways to create such a blinds effect. On a four bitplanes screen, I might again have picked sprites, but it wouldn’t work as nice and fast (animation wise) here.
So I´ve painted this 32 pixel wide “animation”, where each frame is a two pixel high bar that is copied all over the screen vertically for the 10 columns of the 256 pixels wide screen. The animation just moves downwards by two pixels to create the effect of expanding and wiping bars.

A naive approach would blit every column and merge it with the existing image. As we are using five bitplanes, reading in the pattern from memory and maybe even a mask would take too much bandwidth. Let’s do the calculation:
256 pixels width x 240 pixels height x five bitplanes x 4 (ABCD blit) = 76800 DMA cycles
We have about 70000 DMA cycles per frame and 19200 are already lost for just displaying the image. We need to reduce the required bandwidth!
The patterns are alternating every second line, but otherwise static. So we can replace the pattern source by a static word and turn off the DMA for this channel. The mask is even easier, it’s just a static word. We are left with a blit with just A and D channels enabled – we need to read the old image and write out the new data.
256 pixels width x 240 pixels height x five bitplanes x 2 (AD blit) = 38400 DMA cycles
Plus the display time this leaves about 12400 cycles for CPU, copper and audio.
However, we now need to perform 160 blits instead of 10! That is a lot of blits. Again the copper is used to drive the blitter and the copperlists are reused every frame with only the pattern data updated. The copper needs 81 instructions per 16 pixel stripe, so the copper alone needs about 3240 additional DMA cycles.
You might are able to see that every blit takes almost two rasterlines (in the visible area). This is on the tight side to stay within a frame: Background tasks need to be disabled and blitter hogging will be off only in the top part where the CPU needs to update the blitting dat. Otherwise, the blitter might be slowed down by 20% with the CPU eating some cycles and overflowing the frame time.
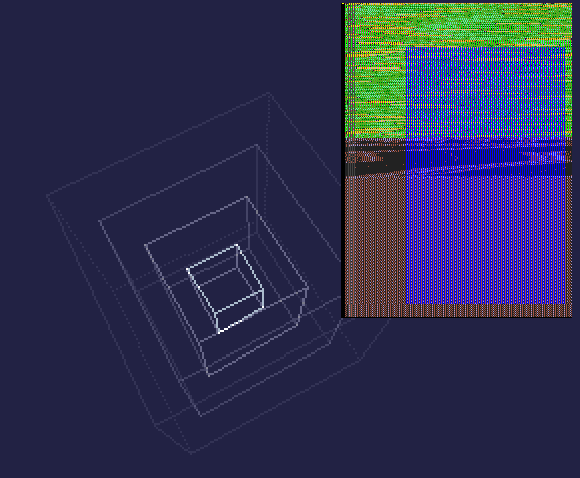
Part of Optic’s design story board was the squares sequence, synchronized to the music.
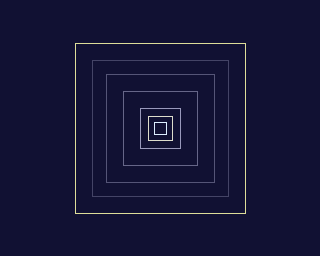
This very cheaply made using an eight colour screen with the seven boxes, each using a different colour. I left out the perspective lines that would be added when turning the image from 2D to 3D, because it would have spoiled the clean design.
The colours are palette faded scripted to the music position.
This is the last chance to get everything in place because with the main glenz cubes effect and the scroller entering, nothing is allowed need more than a frame to complete, otherwise we would get a jerky scroller. More on that later.
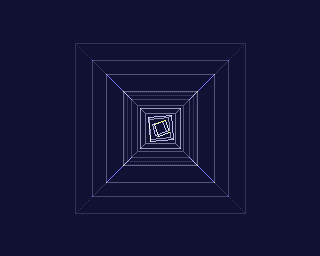
This was supposed to be the original main one-screener effect.
It’s inspired by the old classic Mindriot by Andromeda. The five cubes in Mindriot are in three bitplanes hires (non-laced) at about 384 x 192 pixels without perspective projection. 60 lines are being drawn, the buffers are cleared every frame with the CPU and the blitter.
The ‘glenz’ effect is achieved when lines in different bitplanes meet. The resulting colour is chosen in a way that it is much brighter than the lines without intersection.
The aim was not to replicate the effect identically, but rather see what can be achieved. It was designed to run in 256x256 pixels with four bitplanes active.
First, I thought I could use the blitter also do math operations in line mode, but that is unfortunately not possible (or at least I didn’t find a way), so no way to directly get an addition/glenz like effect with blitter lines.
Then I pondered whether the CPU might be able to draw additive lines, but a quick calculation told me that the total length of lines of several cubes would easily surpass the clock cycles available.
So I started with four traditional cubes where the “front wires” are drawn into one bitplane and the “back wires” in another. This adds to the perspective feel. For the outmost cube, I used a dotted line instead of a full line, otherwise four bitplanes would not be enough. Note that the front side of one cube and the back side of the next (smaller) cube will not “glenz” because they are in the same bitplane. I think this is neglectable.
This worked and resulted in four glenz-cubes with less than half a frame spent on blitter time. Note that the cubes are being drawn and erased with the copper controlling the blitter to be as fast as possible. The code generates two copperlists simultaneously for every line – one to draw it in one frame and one to erase it two frames later (due to double buffering).
The rotational and perspective projection math for each cube fits nicely in the idle cycles of the blitter line drawing (except for those big black idle holes of division operations).
Half a frame free! Can we get more cubes? I could go to five bitplanes, which would give me one more cube (and suck DMA time for displaying). Not much gained.
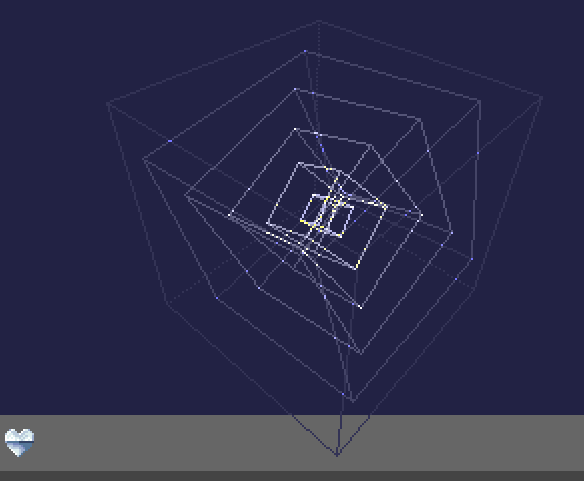
How can we get more independent bitplanes? Well, if the cubes in the center would fit within a 64x64 canvas, I could use attached sprites to get another four ‘bitplanes’! But the sprite wouldn’t ‘glenz’ with the bitplane sprites automatically.
Luckily, we can use the blitter to merge the bitplanes of three of the four cubes into one sprite plane which leaves us with three more planes to add more cubes.
For the sprite cubes, I decided to not use the draw and undo approach as for the bigger cubes, but instead clear the 64x64 pixel memory and draw the lines only once.
Of course, the planar buffer needs to be converted to sprite data with the blitter, so this adds a bit of overhead.
But look, it still nicely fits inside a frame (at least regarding the blitting):
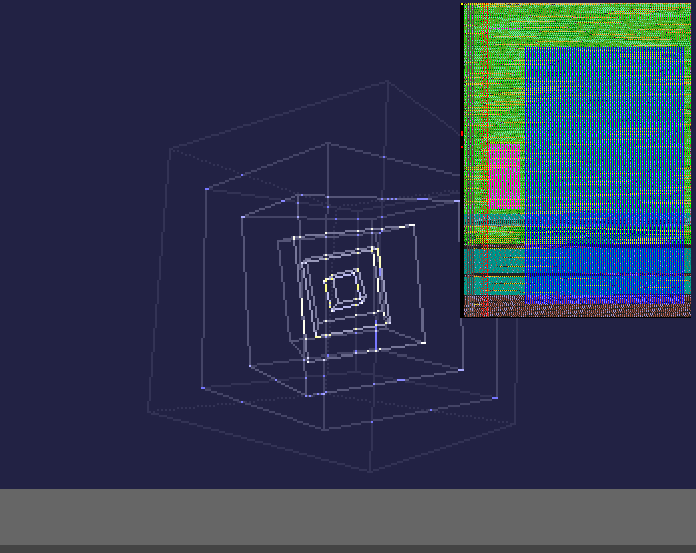
Note that it is a good idea to have the math code inside blitter busy regions, ideally with normal blitter operation (line drawing is also okay, but less optimal), because this helps to get the divisions and multiplications actually ‘for free’.
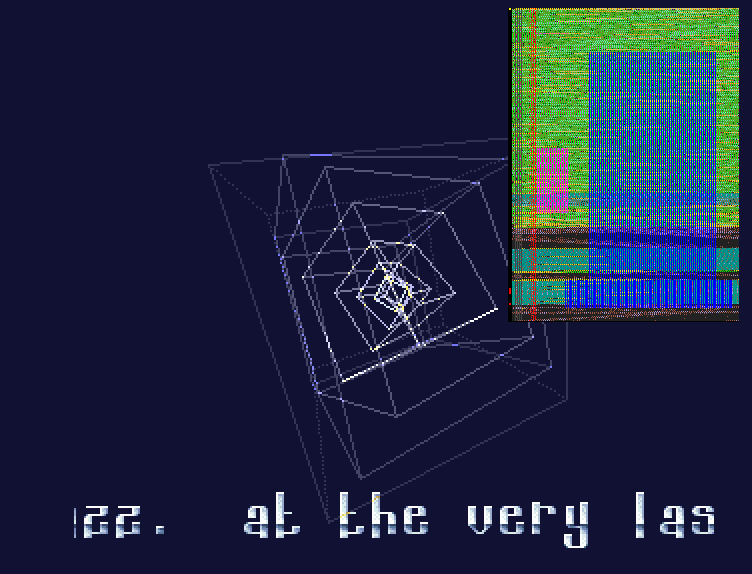
The scroller (and font) has a height of 28 pixels. But it would be not cool if the cube lines would be cut off by the scroller.
The scroller itself uses eight colours (three bitplanes) and is scrolled using the normal double width hardware scrolling mode (704 pixels wide). The cube, however, uses a 256 pixel wide display and memory buffer. How can we merge this together, especially if we don’t want to do any additional blitting?
Dual playfield to the rescue! Except that we’re not going to use dual playfield. But the principle is the same. We will spread the scroller to the odd bitplanes 1, 3 and 5 and the first cube bitplane will go into both plane 2 and 4. This allows us to have different scrolling values and bitplane modulos.
I would take a bet that you did not think about this issue when first viewing the intro.
Only the lines of the outermost cube will actually end up in the scroller area, that’s why we will use cube bitplane 1 in the new bitplanes 2 and 4. Note that theoretically the left and right 32 pixels portions would be repeated, but luckily, no lines end up in these regions.
At about 28 pixel from the bottom of screen we need the copper to update both modulo registers and all five bitplane pointers, the scroll register and 32 colours (the right 16 ones would have been enough, but somehow I missed this opportunity).
There is one problem though: raster line 256.
The copper cannot directly wait for lines past line 255. Instead, it must wait for end of line 255 and only then can we issue a wait command for later lines (otherwise the wait would be satisfied immediately).
Our problem is that the copper is busy driving the blitter. While the copper is doing that, it cannot (easily) be used for standard raster manipulation. Luckily again, the blitter work is finished (except for the sprite conversion) and it would be ready for us to utilize.
However, due to the variable line lengths of the cube, the workload is slightly different every frame. Together with the blitter merging the planes for the sprites, the copper sometimes finishes before and sometimes after line 255. But there is no way for me to know this in advance.
I could not think of any other solution than after running the variable workload to wait for a certain position that I know will make the copper-driven constant blits following this position, take that much time that it will be AFTER line 255 in each and every case (I broke this in a first beta version, and thankfully 4play found this glitch on Amigas with real fastram).
Then, the copper waits for the line to change to the scroller and afterwards continues with copper-driven blits.
Look how this shows up in the DMA monitor:
Also notice the bottom line of the cube tinting the scroller golden ;)
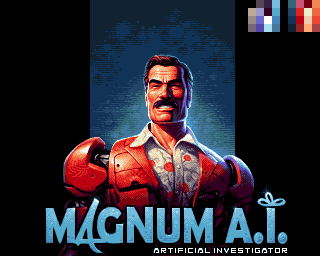
No AI was used in the process of making this intro. It’s only by incident (after a glorious pun) that Optic came up with the title and the amazing half-man half-robot Tom Selleck image. Of course, he again used 32 colours to give the coder some headache how to fit all these graphics in intro that was originally planned to be a 40k (for Black Valley).
But if you look at the quality of the image, I really can’t say anything against it :)
Before Optic delivered the screen, I had the hope to have the scroller running over this part, too, so I planned everything to have a seamless transition without the scroller jerking one single frame. Which is hard because the cube part is already at such a high load and will want to execute its copperlist even when you thought about switching parts.
Then the image arrived and the “Magnum A.I.” text was all at the bottom. It was clear that the scroller wouldn’t fit.
So the code with the scroller was removed again. Sigh.
The scan effect is pretty straight-forward (palette changes, hardware scrolling) – it only gets a bit complicated at the copper split (see below).
The CIA music routine is replaced by a slightly modified
one that would write a displacement value to the scroll
register bplcon1 at the start of the routine and
restore it again after the LightSpeedPlayer routine.
This would give a rolling distortion because the CIA timing was set to 124 BPM, so the CIA timer was slightly slower than 50 Hz. It was inspired from bifat/TEK’s approach in Kadesh.
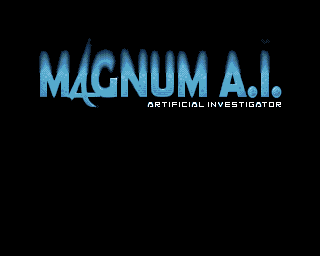
I would have loved to burn the whole image down. Unfortunately, I am a quite lazy guy, and it was hell already to write the 21 blitter pass fire effect for four bitplanes for HAM Eager. I clearly wasn’t going to do the same for five bitplanes.
So instead I would concentrate on burning the “Magnum A.I.” text only instead. Therefore, the palette needed to be remapped for the logo to only use the first 16 colours.

Note that there is a split in the copperlist that allows the text to be faded in separately from the rest of the image because the blue colours are not used in the bottom part except for the logo itself.
As the graphics are being faded out and the top portion of the image is no longer been shown, the logo is copied to the top part of the screen memory (only four bitplanes instead of five) and a second copy is used for double buffering.
The bits of the graphics that use the colours higher than index 12 are masked out using the blitter, so we don’t get any artifacts when switching from five to four bitplanes.
The blitter manages to burn about 256x45 pixels in one frame (I guess having a small display window also helps!) and this what we use as maximum height for the rolling window.
I originally planned to add some blitter tornado movement, but it was more important to have it running in 50 Hz.
This effect is based on code I wrote for the Virgill Bars of HAMazing. It uses the same basic principles, but it skips everything needed for rotation.
It’s running a normal six bitplane HAM screen and is calculating and real-time generating one 320 pixel line every frame (the Virgill Bars are using a 512 pixel wide line every two frames).
As before, internally every pixel is stored as 3 x 16 bit value and saturated and converted to 12 bit using the blitter (with optional dithering).
It is written to a 256 lines tall circular buffer and the copper
is used to do the scrolling and vertical scaling so that it disappears
in the background (using the bplmod registers).
The updating of this copperlist was a hell of a job to get working correctly – of course it would have been easier to create the copperlist from scratch in every frame, but it would have been a lot slower – especially because we only need to update the start of the bitplane and the one position where the screen wraps around vertically. Of course, the copperlist needs to be double buffered, so undoing the vertical wrap modification is lagging a frame behind. Calculating the exact position of the wrap is a bit tricky due to the perspective skew. If you’re off by one line, it will just go bonkers and look shit.
The music is visualized with up to four bars of coloured light. There was enough memory to store eight different bar colours as every bar needs 3 (RGB) x 64 (width) x 32 (volume levels) x 2 (words) = 12 KB, so the bar data takes 96 KB of fast ram. This time, the colours of the bars are using a quadratic fall off and there’s a white light and black shade added to it.
An unrolled movem/add.l loop quickly adds the precalculated data to the line buffer that is then processed by the blitter in the next frame and then again converted to HAM pixels by the CPU in the following frame (so this is pipelined).
On faster CPUs, you will get the Sudoku dithering pattern and slightly better HAM pixel calculation (that includes the use of index colors, yay!).
The fading is done by picking every 16th line and fading it down one step as I have done countless times before. This will fade the image to black in 16 steps. The only thing that might a little more advanced is to not do 16 single fades, but combine these to one fade every 16 lines by using a large blitter modulo value, skipping over 15 lines. The offset from 0 to 15 is determined by the vertical scroll position, so it does not need to be split into two passes because of memory wrap around problems.
Finally, blitter/frame time was still a bit on the tight side,
therefore it does not calculate a full four bitplane mask for
fading, but rather only merges the bitplanes 2, 3 and 4.
Thus, the graphics will not fade out to black but rather
to the $111 grey tone. Black will stay black though.
To be able to fade out index colours, too, the index palette was chosen
as $000,$111,$222,[...],$fff so the fading works just fine with those.
I asked for it, so Optic drew this amazing sprite overlay for the HAM screen. We’re using three colour sprites that would give us a maximum width of 128 pixels.
![]()
I told Optic that we could use palette switching to make it a bit more colourful, because a pair of sprites will share the same three colours making it possible to have 4*3 colours in total, at a breaking point every 32 horizontal pixels. However, it was also possible to change one, two or even three colours per sprite at every vertical position.
Optic then sent this template for me to work with:
![]()
For you to see it a bit more easy, I’ve added a copy of the sprite to the right with some darkening every 32 pixel, so you can see where the horizontal cuts are where it is allowed to change colours. Not everything he wished for was possible unfortunately (remember that each 32x1 pixel line may not contain more than four colours including the transparent background). Moreover, the image was offset to the right by one pixel.
So I modified the sprite data to look like below, to make more use of the ‘unused’ colours in each vertical section.
![]()
Can you spot the differences?
Then, in a painful manual job, I wrote a copperlist multiplexer that
would merge changes to the colour registers with the perspective
skew bplmod commands.
The input data looks like this:
        dc.w    $2c00+7<<8,2
        dc.w    color+26*2,$56b
        dc.w    color+30*2,$45a

        dc.w    $2c00+10<<8,1
        dc.w    color+22*2,$67b

        dc.w    $2c00+19<<8,2
        dc.w    color+26*2,$85b
        dc.w    color+30*2,$63a

        dc.w    $2c00+26<<8,1
        dc.w    color+31*2,$397

        dc.w    $2c00+48<<8,2
        dc.w    color+30*2,$746
        dc.w    color+31*2,$fdb

        dc.w    $2c00+54<<8,1
        dc.w    color+22*2,$56b
But it’s muuuch longer, because I could not stop at the original proposal. In total, there are 77 colour changes plus 12 colours to start with. These modifications yield in this image:
![]()
The resulting image uses 63 different colours instead of only 3.
It’s not perfect, and Optic could probably have optimized and enhanced it, but as usually, these things only pop up a couple of days before the deadline. Sometimes it’s okay to be good enough.
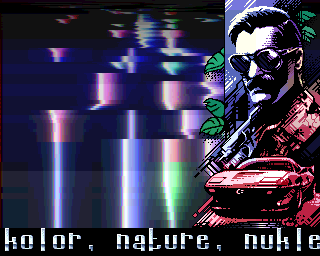
The next part adds a rotowarp effect to the piano roll. It is basically a single line texture mapper.
From a calculated starting point in the 256x256 pixel texture that happens to be the Magnum A.I. title image, it wanders along the texture in different angles and distances. The index is then used for lookup the 12 bit colour in either the 12 bit original palette or an HSV shifted rainbow palette before being converted to HAM pixels in real-time.
So it’s a very simple effect actually, a poor man’s rotozoomer, updating one line each frame. But it still looks cool due to the perspective skew and fading (I think).
Optic warming up to adding more and more stuff, he drew these six cute little Ferrari frames for the Rotowarp screen:

Displaying one car (64x44) as eight attached sprites moving across the screen would have been easy. But how challenging would it be to have them multiplexed across the screen?
The Amiga sprite hardware is a pain in the ass. Yes, you can do multiplexing, but the sprite data needs to in memory consecutively. Or, alternatively, you need to use the copper to update sprite pointers to different memory locations at the right time.
Otherwise, you would need to assemble your sprite list manually every frame, which defeats the purpose – sprites are only useful if you don’t have to blit (much) data around.
The frame time was already running tight here. Updating the eight sprite pointers would mean 16 additional copper instructions per line (with six bitplanes active!), and because we have a static copperlist that is only updated slightly every frame, this sounds like a no-go.
So what’s left?
If we don’t want to copy, we have to have the sprite data consecutively in memory. So just copy the same image six times and we’re done? But we have animated cars! Hmmm…
We can store a cycle of the car animation sequentially in memory and to cope with the wrap around by copying another row of cars. By incrementing the position into this buffer the first car will get an increasing frame number and the next car will use the next animation cell. Six cars, six frames (or actually twelve).
That might be exactly what we need.
We do need to keep the cars ‘sorted’ by Y position and
make sure we’re using the animation frame of the top car
and if there’s a new car coming in, it has to use the
prior animation frame of the next car that used to be the top one.
The last (lowest) car terminates the sprite list by
writing zeroed sprctl/sprpos words.
We still need to update the positions of the sprites and because I have had enough bad experience with hoping that my sprite word modifications will not interfere with the sprite being displayed at the same time, let’s double buffer it.
Total chip mem used: (12*(44+1)+1)84*2 = ~34 KB.
There is one more thing: Sprites do not clip nicely at the top if they are too large (the bottom is not so much of a problem). This is due to the fact that the sprite DMA always loads the sprite control words at around rasterline 25 and therefore sprites cannot start earlier than that. Our display starts at rasterline 44, but our cars are 44 pixels high. If we want the sprites to enter the screen at the top smoothly, we will have to do something.
(You can, if you want to, compare this to Planet Disco Balls (YT), where you can see the balls popping in half-way at the top (not that I had cared about that phenomenon before doing Magnum A.I.) – also the sprites are blitted to big sprite lists every frame, that takes about 1/3rd of the frame.)
One thing I started trying out was to backup the longword of every sprite just before the first line of the sprite data I want to clip to and restore it again later. But it quickly got complicated and annoying for eight sprites and double buffering. Too much code overhead.
So I ended up with a different solution. The top car keeps its control words at the original spot as usual, but uses a decreased height in case it needs to be clipped. Just after the sprite DMA has loaded the sprite control words, the copper updates the sprite pointers in line 26 to point at either the top line of graphics (+4 of the original sprite list addresses, so practically unchanged) or to the correctly clipped start position further down.
![]()
I originally wanted the cars to drive behind the scroller, but as the scroller needs an earlier DMA start for the bitplane DMA to be able to scroll, it would make two sprites unusable. So instead, sprite DMA is turned off and the position is set to be outside the screen to disarm the sprites before the scroller starts.
The cars are speeding up slightly vertically while they drive across the screen, and they move at different speeds horizontally. They may, of course, never overtake each other, or the sprite multiplexing would no longer work.
Because the change from the piano roll screen to the rotowarper has to be seamless without frame drops, it is not possible to recreate the copperlists and offset tables when switching the effects. This meant that I was stuck with the copperlist that did all the fancy palette changes with. And that would have looked quite strange on the cars. Moreover, new slots are needed for the loading the original 16 colours now for the sprite pointers.
So there is a background task that fixes the two copperlists to fill some of the >70 slots down the copperlist with the new colours for the ferraris and turns all other palette changes into NOPs.
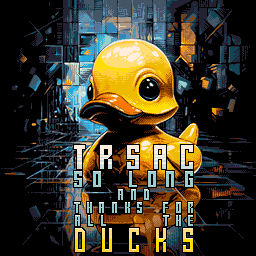
As this was (supposingly) to be the last TRSAC ever, I thought it would be nice to have a goodbye gift for the organizers. We had about 12 KB of space left.
At the last moment, Optic delivered the duck image and I had no idea, how I should be adding it in a nice way.
I picked a transition where the duck replaces the Magnum A.I. title logo texture after the music had ended. It gradually morphs by copying the pixels positions given from a pseudo-random LFSR.
But the image was too distorted to do the great art justice. Just a few days before the party, I added the end screen by copying the scan-effect from the Magnum A.I. title.
mA2E delivered a very nice track using a sample set from a Virgill tune, because it still takes some time (and work) to get into creating your own samples with AmigaKlang – which shouldn’t be an excuse really ;)
Somehow, the original Magnum series theme or vibe didn’t make it into the tune, but I’m still very pleased with the result. mA2E’s tune had so many nice cues that would make it good points for effect switches that I really felt we would need to start the intro from scratch if we had changed the music.
I was allowed to make some minor modifications to the first version, exchanging the chord samples by leaving the lead intact. It would cause the samples to grow in size by 16 KB though.
I guess that was the most important stuff out of >10.000 lines of assembly code. Curiously, there was almost as much to write about this tiny 64 KB intro as was for the full disk trackmo HAMazing.
I hope you enjoyed it.
Best regards
Stolen Diaper
The last part is not so interesting anymore, it’s just to point out that you can spend days and days trying reshuffle your buffers, change the order how and when stuff is run in the background.
It really increased my respect for sceners doing one-file demos.
So what’s our memory budget? After booting into AmigaDOS we have around 450 KB of chipmem and fastmem (ranger ram, slow ram) left.
Let’s see how we will use it:
| Chip memory items | Size |
|---|---|
| Music samples | 182 KB |
| Circle sprites | 14.5 KB |
| Circle bottom bitmap | 5 KB |
| Magnum walking anim | 2 KB |
| Sprite overlay | 7.2 KB |
| All other chip buffers | 179 KB |
| -Total- | 389 KB |
| -Left- | 56 KB |
The 179 KB of working memory is not much to provide seamless transitions between the parts. 56 KB left-over memory may seem large but due to fragmentation and the order how you allocate the ram blocks, you have to be very careful if you can actually allocate more ram in the AmigaDOS scenario (e.g. second disk drive, higher Kickstart versions etc.).
Let’s look at the non-chip mem allocation:
| Fast memory items | Size |
|---|---|
| Code | 36.5 KB |
| Variables | 2 KB |
| LSP music data | 24 KB |
| Planet (chunky) | 40 KB |
| Planet Jazz (chunky) | 60 KB |
| Twinkle anim (chunky) | 3 KB |
| Font (chunky) | 25 KB |
| Ferraris (chunky) | 16.5 KB |
| Title gfx (chunky) | 64 KB |
| TRSAC duck gfx (chunky) | 64 KB |
| HAM lookup table | 64 KB |
| Misc data | 6 KB |
| Scrolltext | 7 KB |
| Total | 412 KB |
| Left | 44 KB |
44 KB is not much at all, given the fact that often decompression will not happen in-place or at least without some overhead.
Most of the graphics are stored in chunky pixel format as it compresses much better than using the planar format in most cases.
Many of these chunky buffers are recycled throughout the intro.
The uncompressed binary is 377 KB large and uses a lot of different hunks.
| Hunk | Mem | Type | Size |
|---|---|---|---|
| 0 | ANY | CODE | 37432 |
| 1 | CHIP | DATA | 22124 |
| 2 | CHIP | DATA | 7376 |
| 3 | ANY | DATA | 107840 |
| 4 | ANY | DATA | 65536 |
| 5 | ANY | DATA | 65536 |
| 6 | ANY | DATA | 40960 |
| 7 | ANY | DATA | 24804 |
| 8 | ANY | DATA | 6036 |
| 9 | ANY | DATA | 6988 |
| 10 | CHIP | BSS | 186372 |
| 11 | ANY | BSS | 65536 |
This has mainly two reasons:
So if you’re coding an intro and you’re running out of space by a few bytes, try adding hunks,
rearranging your data, rearranging your code so that similar routines are close together,
use the same registers (if you can waste the cycles, using exg to get a code block to use
the same registers for a code block from before, then try that).
This part needs 50 KB chipmem for five bitplanes at 320x256 (one plane where the circle is drawn, one for the filled result and three bitplanes being displayed).
Background tasks:
This is all done in the first five seconds while the intro is running.
This part needs two buffers of 20 KB each and the original 16 colours logo (20 KB) and the unpacked full logo (38 KB). The circle sprite copperlist and the bottom part is already in memory.
Once the logo has been built up completely, start these background tasks:
The remapped logo is created (42 KB) but the original one is still needed. The copperlists for the sprite effect take a whopping 22 KB.
Now we need to copy the original logo to a second buffer for double buffering (2 x 38 KB). The copperlists for blitting are stored in the same buffer as before (22 KB).
The squares bitmap (24 KB) is rendered and displayed. The other buffers needed for the main effect are cleared (2 x 32 KB).
Background tasks:
The main screen uses two buffers of 32 KB each. 32 KB of copperlist space is needed, there are many smaller buffers. The scroller (7 KB) and font reuses memory from the circle copperlist. The effect runs at full throttle.
The scripting will branch to the title effect that has everything prepared already and return here later.
The effect lives in its own 40 KB of chip memory. It uses its own copperlist space so the main effect can continue where it left off.
The fire effect will reuse the upper part of the image memory for double buffering.
Background tasks:
There is a large circular 512x256 buffer that is used for the HAM lines. It takes a whopping 96 KB, reusing memory from the main effect and the title screen. There are several more buffers required for the saturation, blitting and copperlists.
Same memory requirements as the piano roll, except for the additional sprite buffers (35 KB) for the Ferraris.
Background tasks: