“Few people will understand the HUGE amount work there is in this funny looking prod” (Luis Pons on YT)
Well. Let’s try to change that.
The following text explains the techniques used and challenges that occurred while writing the Amiga OCS Demo “HAM Eager”, released at Revision Online 2021, ranked 6th at the Amiga Demo compo.
You can download the final version (HD launchable) here as LHA or ZIP
First, I want to thank you people for all the positive feedback you gave me on Pouet, Demozoo, YouTube, Discord and various forums.
Really appreciated.
Unlike many other demo sceners, my return to the demo scene was a fresh start with a zero code base (effectwise). I was never in a group, I didn’t get support doing the graphics (except for Prowler two weeks before the deadline), and I also had to do the musics on my own.
A blank page. From scratch. It was surely a new experience for me, frustrating at times, but also fun for most of it.
This write-up got a bit long. Too long. If I had just done what other coders had done before, it could have been summarized in fewer words. It took me two days to write it down. Two days!
Come on. Let me know if you read actually read it.
PS: I’m sorry about the graphics and presentation not being top-notch.
I originally started with the bootblock by dep/TBL included in the Rocklobster framework, which was a low-level trackloader that made many compromises to be small enough to fit into the 1 KB.
I replaced it by my own code that would reuse the IO-Request of the trackdisk.device that originally loaded the bootblock to load the next stage.
In my first attempt, I still was using Axis’ disk and file layout, with the directory starting in block 2. I needed to load this block to get the size of the second stage to allocate and data to read, if I didn’t want to have a hardcoded size in the bootblock.
As the new bootblock was very small, I could reuse the buffer of the bootblock to load the directory with the given IO Request. With this information the (fast) memory for the second stage could be allocated and the IO-Request is triggered one last time to load the framework into memory.
Not so fast :-( Under Kick 1.3, the buffer memory used for trackdisk.device IO-Requests need to be in chip memory! Bummer. So under Kick 1.3, the bootloader uses a workaround by loading the second stage block-by-block into the bootblock buffer and directly into fast ram in one go on later Kickstart revisions (where the cache is also flushed!).
That worked nicely, but the disk/file layout was a bit unfortunate, and I wanted to have compression for the framework as well.
The final bootloader is only one block long instead of two. The second block is already used for directory information and therefore directly accessible when the OS loads the bootblock. The framework is compressed using LZ4, and the LZ4 decompressor (by Leonard) is tiny, so it is always loaded into chip memory and then decompressed to fast memory. The code of the bootloader is less than 200 bytes.
One noteworthy feature of the bootloader is that it actually tells the OS to execute the framework code by returning from the bootblock with the address in a0, giving the OS the chance to free all its temporary memory (IO structs, buffers, etc.).
_start:
        dc.b    'D','O','S',0 ; disk type
        dc.l    0           ; checksum 'PLAT'
        dc.b    'ON42'      ; root block 'ON42'

_entrypoint:
        ; Because this is a bootblock, we will have ExecBase in a6 here
        ; a1 is IO-Request
        movem.l a2-a6/d2-d7,-(sp)       ; keep registers safe, otherwise bootstrap will crash
        move.l  a1,a2

        move.l  _start+512+20(pc),d0    ; de_MemorySize
        moveq.l #MEMF_ANY,d1
        CALL    AllocMem
        move.l  d0,-(sp)
        beq.s   .error

        move.l  _start+512+24(pc),IO_OFFSET(a2) ; de_DiskOffset
        move.l  _start+512+28(pc),d0    ; de_DiskLength
        move.l  d0,-(sp)
        or.w    #$1ff,d0
        addq.w  #1,d0                   ; round to 512 block size
        move.l  d0,IO_LENGTH(a2)

        moveq.l #MEMF_CHIP,d1
        CALL    AllocMem
        move.l  d0,-(sp)
        bne.s   .good
.error  move.w  #$f00,$dff180
        bra.s   .error
.good
        move.l  d0,IO_DATA(a2)

        move.l  a2,a1
        CALL    DoIO
        tst.l   d0
        bne.s   .error

        move.l  (sp)+,a0
        move.l  (sp)+,d0
        move.l  (sp),a1
        bsr.s   lz4_depack          ; a2 not trashed

        move.l  IO_DATA(a2),a1
        move.l  IO_LENGTH(a2),d0
        CALL    FreeMem

        cmp.w   #37,LIB_VERSION(a6)
        blo.s   .lameos
        CALL    CacheClearU
.lameos
        move.l  (sp)+,a0            ; execute this!
        movem.l (sp)+,a2-a6/d2-d7
        moveq.l #0,d0               ; no error
        rts

        include "lz4_smallest.asm"
The framework was originally based on work by Axis from the Rocklobster framework. It provides:
The memory allocation still uses a “two regions” concept, but was rewritten. The memory can be either allocated top->down or bottom->up, making it possible to keep multiple parts in memory without fragmenting the memory. It was extended for the background tasks to allow them to also allocate memory without interfering with the main thread.
Empty memory is allocated with two different means:
The latter has two advantages:
The loader originally was based around Photon’s code snippets. I reworked it, fixed bugs and rare error conditions. I also added last minute support for loading the demo when booting from different disk drives (works with Kick >=2.0).
The loader is multitasking capable, so while waiting for the head to settle or the DMA transfer to be ready, it will return the control to background tasks. Waiting has been changed from the raster position to CIA TOD clock, as waiting may wrap to the next frame and then the raster line information will become invalid.
I didn’t add specific support for genlocks, so the loading might be a tad slower there (TOD clock runs at half the speed with genlocks connected). But don’t try to run HAM Eager with a genlock, it will look even uglier with more weird stuff happening on screen (okay, maybe when you’re on drugs).
Also, after MFM decoding a track, the next raw track will immediately be prefetched from disk. This, of course, speeds up loading slightly.
Moreover, the loader is able to load and decrunch LZ4 compressed data incrementally as it is loaded from disk without needing any temporary memory. The decompressor was turned into a streaming state machine that can be stopped and resumed at any input byte.
There is also a variant that can incrementally load and decrunch delta encoded LZ4 data. This is used for the music samples of the first tune. It was a bit tricky to get right as the target data is immediately delta decoded (not as a second pass after everything was decrunched – otherwise e.g. the sample data will not sound correct until everything was loaded). That means that back-references in the LZ4 stream point to data that cannot be copied verbatim, but needs to reapply the former delta of the decrunched data when writing the new sequence.
The framework supports Doynax (Axis’ implementation) and LZ4 (Leonard’s implementation and two of my own in the trackloader), both optionally with delta encoding.
Delta encoding improves compression for example on sample data. Other compression methods were proposed, but did not make it into the framework at the time.
Most of the time Doynax is used because it has better compression rates, though decompression is a bit slower.
Axis originally used a slightly modified AmigaDOS hunk structure, where each hunk was compressed with Doynax with the relocation information reduced to 16 bits per entry.
Unfortunately, the tool that generated the format was flaky, and the decoding routine in the demo tried to compensate for those bugs in a very non-deterministic, buggy way.
It also meant that the whole (compressed) file would have to be in memory before decrunching, and in this case Doynax was not meant to be used for in-place decompression (it uses two streams and therefore would require a significant amount of extra buffer).
Therefore, I rewrote the whole disk layout tooling and put the hunk information into the directory table, adding more information like uncompressed size etc. and a filename for your appreciation.
This results in disk-loading and decrunching being even more interleaved as the decrunching of one hunk takes place while the next track is prefetched. Also, temporary memory requirements are lowered.
The track-based loading of LZ4 compressed data does not need additional temporary memory (except for the one MFM-decoding buffer of 5.5 KB).
Here’s an example of the disk layout for HAM Eager:
 0:   2048 PlatOS              8371 0/0   12412 |   0 KB CHIP |  12 KB FAST | FAST DATA       LZ4
 1:  10420 EagerBeaver.p61     1654 0/0    1654 |   0 KB CHIP |   1 KB FAST | FAST DATA
 2:  12074 Colorbars           2234 0/4    5116 |   0 KB CHIP |   4 KB FAST | FAST HUNK CODE  DOYNAX
 3:  14308 Colorbars             64 0/4       0 |   0 KB CHIP |   4 KB FAST | FAST HUNK RELOC
 4:  14372 Colorbars           3669 1/4    8232 |   8 KB CHIP |   4 KB FAST | CHIP HUNK DATA  DOYNAX
 5:      0 Colorbars              0 2/4     320 |   8 KB CHIP |   5 KB FAST | FAST HUNK BSS
 6:      0 Colorbars              0 3/4   19744 |  27 KB CHIP |   5 KB FAST | CHIP HUNK BSS
 7:  18042 EagerBeaver.smp   100255 0/0  166652 | 162 KB CHIP |   0 KB FAST | CHIP DATA       LZ4 DELTA8
 8: 118298 CommonTables.bin   13173 0/0   16384 |   0 KB CHIP |  16 KB FAST | FAST DATA       DOYNAX
 9: 131472 Floodfill           1143 0/3    1848 |   0 KB CHIP |   1 KB FAST | FAST HUNK CODE  DOYNAX
10: 132616 Floodfill             28 0/3       0 |   0 KB CHIP |   1 KB FAST | FAST HUNK RELOC
11: 132644 Floodfill           4427 1/3   14636 |  14 KB CHIP |   1 KB FAST | CHIP HUNK DATA  DOYNAX
12:      0 Floodfill              0 2/3     344 |  14 KB CHIP |   2 KB FAST | FAST HUNK BSS
13: 137072 FSHamFade           7371 0/3   13416 |   0 KB CHIP |  13 KB FAST | FAST HUNK CODE  DOYNAX
14: 144444 FSHamFade            196 0/3       0 |   0 KB CHIP |  13 KB FAST | FAST HUNK RELOC
15: 144640 FSHamFade          40992 1/3   48316 |  47 KB CHIP |  13 KB FAST | CHIP HUNK DATA  DOYNAX
16:      0 FSHamFade              0 2/3     180 |  47 KB CHIP |  13 KB FAST | FAST HUNK BSS
17: 185632 Scroller            9229 0/3   23904 |   0 KB CHIP |  23 KB FAST | FAST HUNK CODE  DOYNAX
18: 194862 Scroller             144 0/3       0 |   0 KB CHIP |  23 KB FAST | FAST HUNK RELOC
19: 195006 Scroller            1816 1/3   24968 |  24 KB CHIP |  23 KB FAST | CHIP HUNK DATA  DOYNAX
20:      0 Scroller               0 2/3    1856 |  24 KB CHIP |  25 KB FAST | FAST HUNK BSS
21: 196822 Gradient.raw       27732 0/0   30720 |   0 KB CHIP |  30 KB FAST | FAST DATA       LZ4
22: 224554 Orongo.raw         89191 0/0   92160 |   0 KB CHIP |  90 KB FAST | FAST DATA       LZ4
23: 313746 Metaballs           1581 0/3    2704 |   0 KB CHIP |   2 KB FAST | FAST HUNK CODE  DOYNAX
24: 315328 Metaballs             32 0/3       0 |   0 KB CHIP |   2 KB FAST | FAST HUNK RELOC
25: 315360 Metaballs           1927 1/3    3336 |   3 KB CHIP |   2 KB FAST | CHIP HUNK DATA  DOYNAX
26:      0 Metaballs              0 2/3     892 |   3 KB CHIP |   3 KB FAST | FAST HUNK BSS
27: 317288 CincoLoco.p61       3046 0/0    4616 |   0 KB CHIP |   4 KB FAST | FAST DATA       DOYNAX
28: 320334 CubePan            36930 0/4   68788 |   0 KB CHIP |  67 KB FAST | FAST HUNK CODE  DOYNAX
29: 357264 CubePan              132 0/4       0 |   0 KB CHIP |  67 KB FAST | FAST HUNK RELOC
30: 357396 CubePan            80896 1/4  148992 | 145 KB CHIP |  67 KB FAST | CHIP HUNK DATA  DOYNAX
31:      0 CubePan                0 2/4   38916 | 145 KB CHIP | 105 KB FAST | FAST HUNK BSS
32:      0 CubePan                0 3/4   28004 | 172 KB CHIP | 105 KB FAST | CHIP HUNK BSS
33: 438292 CincoLoco.smp      56370 0/0  106342 | 103 KB CHIP |   0 KB FAST | CHIP DATA       DOYNAX DELTA8
34: 494662 SexyWoman           1858 0/3    3300 |   0 KB CHIP |   3 KB FAST | FAST HUNK CODE  DOYNAX
35: 496520 SexyWoman             26 0/3       0 |   0 KB CHIP |   3 KB FAST | FAST HUNK RELOC
36: 496546 SexyWoman           1673 1/3    3464 |   3 KB CHIP |   3 KB FAST | CHIP HUNK DATA  DOYNAX
37:      0 SexyWoman              0 2/3     304 |   3 KB CHIP |   3 KB FAST | FAST HUNK BSS
38: 498220 Sacsayhuaman        9051 0/3   21884 |   0 KB CHIP |  21 KB FAST | FAST HUNK CODE  DOYNAX
39: 507272 Sacsayhuaman         228 0/3       0 |   0 KB CHIP |  21 KB FAST | FAST HUNK RELOC
40: 507500 Sacsayhuaman       47945 1/3   61920 |  60 KB CHIP |  21 KB FAST | CHIP HUNK DATA  DOYNAX
41:      0 Sacsayhuaman           0 2/3    3276 |  60 KB CHIP |  24 KB FAST | FAST HUNK BSS
42: 555446 BoxZoomer          69806 0/3  112236 |   0 KB CHIP | 109 KB FAST | FAST HUNK CODE  DOYNAX
43: 625252 BoxZoomer             24 0/3       0 |   0 KB CHIP | 109 KB FAST | FAST HUNK RELOC
44: 625276 BoxZoomer            131 1/3     176 |   0 KB CHIP | 109 KB FAST | CHIP HUNK DATA  DOYNAX
45:      0 BoxZoomer              0 2/3    1496 |   0 KB CHIP | 111 KB FAST | FAST HUNK BSS
46: 625408 SHAM               55336 0/3  111308 |   0 KB CHIP | 108 KB FAST | FAST HUNK CODE  DOYNAX
47: 680744 SHAM                 326 0/3       0 |   0 KB CHIP | 108 KB FAST | FAST HUNK RELOC
48: 681070 SHAM               75887 1/3   97480 |  95 KB CHIP | 108 KB FAST | CHIP HUNK DATA  DOYNAX
49:      0 SHAM                   0 2/3    9492 |  95 KB CHIP | 117 KB FAST | FAST HUNK BSS
50: 756958 OneCircle           1590 0/4    2824 |   0 KB CHIP |   2 KB FAST | FAST HUNK CODE  DOYNAX
51: 758548 OneCircle             52 0/4       0 |   0 KB CHIP |   2 KB FAST | FAST HUNK RELOC
52: 758600 OneCircle           1534 1/4    1832 |   1 KB CHIP |   2 KB FAST | CHIP HUNK DATA  DOYNAX
53: 760134 OneCircle          39159 2/4   49796 |  50 KB CHIP |   2 KB FAST | CHIP HUNK DATA  DOYNAX DELTA8
54:      0 OneCircle              0 3/4     424 |  50 KB CHIP |   3 KB FAST | FAST HUNK BSS
55: 799294 GreenEggs.p61       1100 0/0    1542 |   0 KB CHIP |   1 KB FAST | FAST DATA       DOYNAX
56: 800394 GreenEggs.smp      86097 0/0  115826 | 113 KB CHIP |   0 KB FAST | CHIP DATA       DOYNAX DELTA8
57: 886492 Endpart            12178 0/3   23388 |   0 KB CHIP |  22 KB FAST | FAST HUNK CODE  DOYNAX
58: 898670 Endpart               44 0/3       0 |   0 KB CHIP |  22 KB FAST | FAST HUNK RELOC
59: 898714 Endpart             2294 1/3    3496 |   3 KB CHIP |  22 KB FAST | CHIP HUNK DATA  DOYNAX
60:      0 Endpart                0 2/3     192 |   3 KB CHIP |  23 KB FAST | FAST HUNK BSS
61 entries in image, 901008 of 901120 bytes used (112 bytes (0 KB) free)
Total size uncompressed: 1405668 (1372 KB)
112 free bytes left on the disk. Send a facsimile to fireman Sam.
I wanted to have background loading and needed background processing for a couple of demo effects. So I added a very simple task switcher to the framework.
Whenever the main thread tells the framework that is done with its work and only waits for the next frame (WaitVBL) the framework checks if there still is enough raster time left and then swaps the registers and the stack pointer to a primary or secondary background task.
This dispatching happens without interrupt or trap in user space using the infamous 68000 RTR instruction, minimizing CPU cycles needed to do the transition.
This is the dispatcher routine (slightly shortened):
vsyncwithtask:
        tst.l   fw_BackgroundTask(a6)
        beq.s   vsync
        move.l  #$1ff00,d0
        and.l   vposr(a5),d0
        cmp.l   #MAX_VPOS_FOR_BG_TASK<<8,d0  ; if we're too late, don't continue background task
        bgt.s   vsync
        ; context switch takes at least 400 cycles, which is around 4 raster lines (with idle DMA)
        PUSHM   d4-d7/a4-a6 ; save registers according to ABI, 64 cycles
        bsr     .switch
        POPM                ; 68 cycles
        rts
.switch
        move.l  sp,fw_PrimaryUSP(a6)    ; store old stackpointer (pointing to RTS address)
        move.l  fw_BackgroundTaskUSP(a6),sp
        movem.l (sp)+,d0-d7/a0-a6       ; restore context, 128 cycles (another >132 cycles in interrupt)
        rtr
The vertical blank interrupt checks whether it had been running the main thread or a background task and for the latter, just saves the registers of the background thread, loads the stackpointer of the main thread, so once the interrupts ends, the main thread is active again. Due to the way the ABI was defined, for this case, only fewer registers are restored for the main thread and not all 16.
This is the VBL routine for restoring the main thread (shortened):
fw_backgroundtask_irq:
        move.l  fw_Base+fw_PrimaryUSP(pc),-(sp)
        beq     .standard
        move.l  a6,-(sp)                ; save a6, we need a spare register
        move.l  usp,a6                  ; get USP
        move.l  4+4+2(sp),-(a6)         ; store PC
        move.w  4+4(sp),-(a6)           ; store SR
        move.l  (sp)+,-(a6)             ; store a6 in stack frame
        movem.l d0-d7/a0-a5,-(a6)       ; store the rest of the registers
        move.l  a6,a0
        lea     fw_Base(pc),a6
        move.l  a0,fw_BackgroundTaskUSP(a6) ; save USP for background task
        move.l  (sp)+,a0                ; primaryusp from before
        move.l  (a0)+,2(sp)             ; store return PC to exception frame (keep SR unchanged)
        move.l  a0,usp                  ; restore primary USP (now at position before calling the vblank wait)
        clr.l   fw_PrimaryUSP(a6)       ; make sure we will not reload it until has been set again

        [...] do normal IRQ stuff like playing music etc
        ; IRQ may destroy everything here, there's a PUSHM d4-d7/a4-a6 in vsyncwithtask
        nop
        rte

.standard
        addq.l  #4,sp
        PUSHM   d0-d3/a0-a3/a5-a6
        [...] do normal IRQ stuff like playing music etc
        POPM
        nop
        rte
There are two levels of background tasks (primary and secondary) because both loading needs background activity, and the effects, too, do background calculations. Without the second background task, this would not have been possible. The primary background task has priority, though, while the secondary relies on it yielding the CPU when it is waiting for something. It is cooperative multitasking after all.
The framework incorporates a “script” that puts all the parts together. It (usually) directs which file to load from disk (although a part can load files from disk, too!), the order of the effects and so on.
In HAM Eager for example, the script starts by allocating sample memory for the maximum sample size of all three musics (about 163 KB), loads the music data (but not the samples), loads the Colour bars parts, starts the music and executes the first part while establishing a background loader that loads and decrunches the samples for the music and then loads and decrunches the next part (Floodfill) into the other “side” of the memory.
Once the Colour Bars part finishes, the Floodfill is started, installing a hook that the Floodfill part triggers once when it thinks that’s the appropriate time (e.g. after freeing temporary memory at the “ending” part of the effect).
This is an excerpt on how the “script” looks like:
        PUTMSG  10,<"%d: Launching colorbars">,fw_FrameCounterLong(a6)
        lea     .filecolorbars(pc),a0
        bsr     executenextpart     ; colorbars

        lea     .asyncloadfshamfade(pc),a0
        move.l  a0,fw_PrepNextPartHook(a6)

        bsr     waitforpartloaded   ; just in case the loading is too slow

        bsr     switchmemmode       ; allocations have been done by background task, use same direction
        move.l  fw_LastLoadedPart(a6),a0
        PUTMSG  10,<"%d: Executing Floodfill %p">,fw_FrameCounterLong(a6),a0
        jsr     (a0)                ; next effect (floodfill)

        bsr     freeall             ; get rid of old part's memory

        lea     .asyncloadscroller(pc),a0
        move.l  a0,fw_PrepNextPartHook(a6)
[...]
.asyncloadfshamfade
        lea     .filefshamfade(pc),a0
        bra     loadnextpart
Yes, the PUTMSG debug output goes directly into the WinUAE console. And there are plenty of it within the demo. Special thanks again to Toni Wilen for adding this valuable debug possibility.
Before I go into the details of HAM Eager, it is important to know what makes the HAM mode so special. People like psenough have no clue about it. That’s okay. But let me explain it for those who want to know.
HAM is some kind of hardware compression. It uses six bitplanes (64 pens) to display graphics of 12 bit depth (that’s all 4096 colours the OCS/ECS Amiga is capable of).
To achieve this, (most) pixels become dependent on the prior pixel colour information (left to right), by only modifying either the red, the green or the blue intensity. Hence, the name Hold-And-Modify. This also means that you cannot simply plot a pixel onto the screen and tell it to be a certain colour. To achieve a defined colour, up to three consecutive pixels have to be set until the colour is reached.
However, if you always set three pixels, you’re actually reducing the resolution to a third and
it will become a blurry mess. Also, the order of modification becomes important – you wouldn’t want
to change a component that hardly changes if there’s one with sharper change of intensity.
Remember that all pixels are visible and if you want to go from black ($000) to yellow ($fe1)
and change the red value (15), then the blue value (1), and finally the green value (14),
you would get these pixels:
black ($000) -> red ($f00) -> red ($f01) -> yellow ($fe1). Not very nice.
You can still get better looking HAM images: From the 64 possible values, where 3*16 are used to change the intensity of the pixel to the left for red, green or blue, 16 index colours remain that can be set directly. So by picking a good palette for these 16 index colours you can reduce the blur.
So HAM is good for still images. If you want to draw something onto them, this gets very tricky. For example, imagine you want to draw an arbitrarily coloured sharp line across a photo. First, make yourself aware that a single pixel width line might not be possible as you might not be able to reach the desired colour with just one pixel. You would need to find out what the colour left of the pixel actually was then modify one or two pixels to the left (the line might appear wider in places) and then correct the pixels to the right, too.
Take note, that if you don’t do this, an arbitrary stretch of horizontal pixel may get the wrong colour (unless all three components have been set, or an index colour is hit). This ugly effect is also known as HAM fringing (there’s an example in the HAM Scroller section below).
This means:
Enter HAM Eager.

I wanted so have something on the screen as early as possible (I loved State of the Art for doing exactly that).
Usually, loading and decrunching the music for the demo takes ages (say you have a 150 KB module (compressed), that would take about 10 seconds to load from disk, not taking into account the decompression time). Hey, you have an eight minutes max running time restriction at most demo competitions!
Disk and memory requirements had to be minimal for this effect. But it should already show that we were going to have a Dutch colour-scheme infested HAM party.
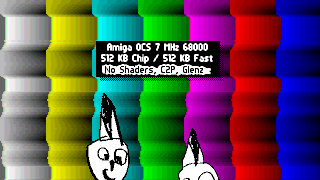
So why not start with a TV test screen with eight colours? Displaying a screen of vertical bars only takes up one line of display memory as we can copy it down using negative display modulo. Using only three bitplanes also leaves more CPU time for the background tasks.
Starting the music with a test tone at first, short sample gives us leverage to switch to a more musical score as samples are loaded in the background.
The test screen appears within two seconds after booting the disk (while writing this write-up, I realise I could have sped it up even more with a few hacks as the prefetching of track 1 that happens automatically becomes completely unnecessary by aligning the next file at a track boundary at the cost of 844 bytes disk space).
With the secondary background task we can calculate some HAM colour enhanced colour bars on the fly, also simulating a VHS glitch effect. We only need a few lines of different shades and will use the copper to select the line we want to display. This way we only use 15 KB for a HAM display instead of 42 KB for full 180 lines.
There’s a short visual glitch when one of the figures hits the box. It’s created by shifting
the even planes to a different offset than the odd planes (BPLCON1).

Add a few sprites (drawn by my son) and copper list memory, and we are at 27 KB chip memory use and less than 6 KB on disk.
You probably haven’t noticed this, but the colour bars use temporal dithering to have even smoother shades than just the normal 4096 colours.

I had been reading a very old computer graphics book (from 1986?) for inspiration. It described, among other things, how to iteratively fill arbitrary shapes (flood filling) starting from a single pixel by or’ing one pixel displaced images (in each direction), slowly growing the seed until it hits a border (that needs to be subtracted before iterating).
I thought: Well, the blitter is very good at these kinds operations, and I don’t care if this actually is a slow way to fill shapes.
So I made a two blitter passes iterative flood filler.
First pass merges (x,y), (x+1,y) and (x,y-1) into a temporary buffer,
the second merges the temporary with (x-1,y) and (x,y+1).
The tricky part was getting the mask right for the shifted source. You wouldn’t want the fill spill from the right border to the left or vice versa.
It was a monochrome only, one bitplane effect. But Amiga coders tend to just combine the prior frames with the current one to get a fake temporal blur. Of course, that’s what I tried, too.
As the nature of the flood filling operation means that you will only get one extra colour per plane, this looked a bit dull in four bitplanes with only four different colours for the last four frames.
Maybe not taking the direct last four frames but leaving out a few frames in between would make things look better. So I increased it to 16 history buffers. And indeed.
However, the fun really started when I added a feedback loop not only mask out the border, but prior frames: The filling operation started to wander around because it ate up stuff it had painted 16 frames before. This also used up a couple more colours!
And it all easily ran within one frame. I tried different feedback operation modes. There was one where the border was getting “sticky” and another one where the border was only visible by the reflections of the flooding waves. The third mode just removed the border masking, letting the current waves flow wherever they liked.
All three modes were used in succession between the Revision logo and the “Platon presents” outlines.
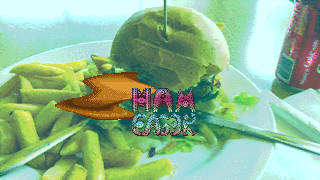
Some of you might remember me from writing an extension for the AMOS programming language called AMCAF. In 1993, I added a command that was able to fade out a HAM image.
The idea for this whole demo came from an EAB thread where there was a claim that HAM images could not be faded at all, and someone referred to my HAM Fade command. There was the question if you could also fade IN such an image. I thought about it for a couple of seconds and said, “Well, yes, sure”.
It achieved this by doing a parallel binary subtraction by one across the four lower bitplanes to decrease the intensity of each red, green and blue component. Of course, doing this without taking into account that there are also index colours would not work. The information that distinguishes from a HAM colour vs. index colour is stored in the planes 5 and 6. Only where at least one bit in plane 5 or 6 is set, the subtraction may be done.
To get a consistent display, all index palette entries must be decreased by one level of grey ($111), too.
Notice that this is no proportional (LERP) fading, but it will look okay.
So in the end, for those familiar with shade bobs, it is in fact operation very similar to shade bobs,
but instead of using a circle shape, the plane (p5|p6) mask is used instead.
And the colour is decreased instead of increased.
And we need a saturation stop: We may not wrap the intensity value from 0 back to 15.
To achieve this, the temporary masking plane (p5|p6) is reduced by the pixels that are
already at a minimum intensity of 0.
Such a pixel is defined to have no bit set in planes 1-4.
So (p1|p2|p3|p4) and (p5|p6) will be our mask for the sub by one operation.
The subtraction itself is just a combination of xor and and operations
(see Binary full-adder).
After max. 15 steps, the image will be black.
The AMCAF implementation was CPU based, but the bitwise subtraction operation can also be achieved using the blitter (and while the CPU based one is faster (less memory accesses) on machines with >=68020 and fast ram, our target platform is 68000).
Notice that only planes 1 to 4 are modified, planes 5 and 6 remain unchanged.
If we start with an image where only the index colours are set (create a copy of the original
image planes p5 and p6 using a mask where p5 & p6 both are zero).
Now we again can fade in components by a mask (shade bob increment operation).
However, like above we may not take the pure (p5|p6) mask, because this will just roll
up the values ever increasing.
So what is our stopping predicate?
We need to compare whether the pixel has reached the intensity of the original image or not.
Luckily, two values are equal if all the bits in it are equal. The operation that returns
whether two bits are equal is the exclusive-or (XOR) operation.
So given p and o, (p1^o1) or (p2^o2) or (p3^o3) or (p4^o4) will return our fading mask.
We don’t even have to take into plane 5 or 6 into account because the index colours are already identical from the start and thus will not be part of the fade.
Thus, planes 5 and 6 remain unchanged and can be taken directly from the original image. This means that the full screen ham effect will only need four double buffered planes additionally to the six planes of the original image (plus temporary planes for blitter operations).
The various other fades (red, green, blue, yellow, magenta, cyan) are left as exercise for the reader.
Fun fact: The fading code is checking the blitter-result-zero flag (BZERO in DMACONR)
after each blit to take shortcuts if higher bitplanes will not be affected by further
operations and thus can be skipped (or simplified).
The wobbly hamburger consists of four three colours sprites (64x48).
![]()
However, two colours are changed at 14 different horizonal lines, making it look a bit more colourful.
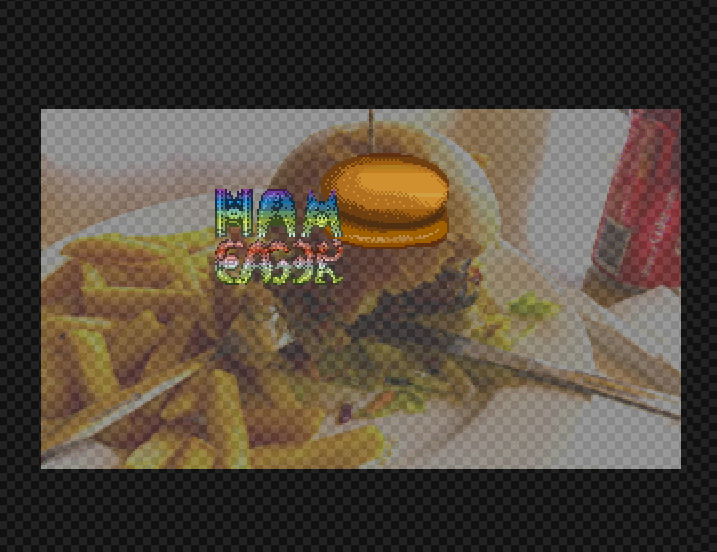
The sheering effect is created by writing the SPRxPOS register of each sprite every line,
changing the horizontal position. Unfortunately, bit 0 of the horizontal position is
stored in the register SPRxCTL and this cannot be written easily as it would
disarm the sprite (making it invisible).
Hence, the horizontal accuracy of the wobbly part of the burger is only every second pixel.
Doing a full screen HAM fade with the blitter is not going to be a 50 FPS effect. But it doesn’t have to, as we only have 15 steps to fade in each direction anyway.
Thus, the sprite movement is run in the VBL interrupt while the blitter works in the background doing its stuff.
As a side note: This effect looks smoother on AGA because 64 bit display DMA is enabled there, leaving more DMA time for the blitter.
One lession learned: Turning off blitter hogging as the first instruction of a copper list is a good idea. Why? Usually, you want the VBL IRQ to not be delayed to only after the blitter terminates, especially large blits are running and you’re only using single buffered copper lists to display your sprite and colour trickery and need to have the timing right. Also, you don’t want to get jitter into the note triggering of the music playback.
So if the main thread has blitter hogging turned on and the blit is likely to cross the frame boundary, turning off blitter hogging with the copper will allow the IRQ actually happen, although much slower than without the blitter running.
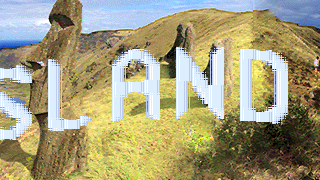
This part of the demo completely runs with HAM mode and six bitplanes enabled all the time.
I was pondering whether I could do a scroller on a HAM image. Having a pure HAM scroller where the letters are in HAM mode would not be so hard, but could you do it the other way round? Or scroll a HAM image inside each letter as if in parallax mode?
There is not much one can do. Fixing up the shapes of the letters as done in the Desert Cube Panorama scene (see later chapters) would not be feasible here as letters are usually not of convex shape and, well, you need more than one on the screen.
Sprites are the only graphical elements that are not affected by the HAM logic in the display chip. But how would we be able to use this? We only got eight of them, each only 16 pixels wide.
In the past, games like Jim Power used sprite multiplexing to create a third layer of parallax scrolling. But with six bitplanes active, there is only enough copper DMA time left to write one custom chip register every 16 pixels. Hence, Jim Power had a repeating pattern every 32 pixels (using two sprites).
So we can move a sprite across the screen or modify its content (monochrome), but not both at the same time.
How could we create a letter or several letters this way?
We have eight sprites, right? If we cannot change the contents of the sprites, maybe having eight different images it is enough if we just juggle them around on the screen?
Yes, let’s try that. Notice that we need to disable sprite DMA for this to work. We don’t want DMA to load up new data into any of our registers (also, we do need the DMA time for ourselves).
For each 16 pixel step, we can decide to move one of our sprites to another location. So we are racing the beam, placing one of the eight sprites ahead of the sprite controller, so it will pick up the new horizontal position and display it there.
We can even make the same sprite repeat every 16 pixel if we get the timing right (we need to make sure we set the new coordinate while it’s displaying the old position and before the raster beam reaches the new one!).
If we want to have a blank space (where the background shines through fully), we will just not place a new one there. This can be achieved by using a copper command that will do nothing, such as writing to the nop address $1fe (or an unused colour register).
Let’s choose the following eight sprite images:
0: XXXXXXXXXXXXXXXX
1: XXXX
2: XXXXXXXX
3: XXXXXXXXXXXX
4:     XXXXXXXXXXXX
5:         XXXXXXXX
6:             XXXX
7: XXXX        XXXX
That looks a bit blocky, as if we only had 4x1 pixel resolution (bah!). So let’s add some minor dithering:
0: XXXXXXXXXXXXXXXX
1: XXXX X
2: XXXXXXXX X
3: XXXXXXXXXXXX X
4:   X XXXXXXXXXXXX
5:       X XXXXXXXX
6:           X XXXX
7: XXXX X    X XXXX
Can we create a font with this? Yes, we can. Made out of only nine (including blank) different 16x1 patterns:

Emoon/TBL think’s it’s ugly. Maybe. Given the limitations I think it is sufficient. (Emoon also passionately hates scrollers in general, so this part is just not for him.)
Unfortunately, we need to make sure that the sprites we used in the one row are not repeated at the same horizontal position on the next line, if we have no demand to display them (similar to the effect when you turn off the sprite DMA while the sprite was currently displaying, creating these nice vertical bars e.g. of the mouse pointer).
So additionally to the 21 visible positions (our screen is 320 pixels wide, but when we scroll, each sprite at the edge is partially visible), we need to reset all eight sprite positions to a place outside the screen, so they don’t mess around with the next line.
Here is a small excerpt of the copper list. Notice the different sprite positions. The first eight MOVE instructions reset the sprite positions to a place left of the border.
 0005f4ac: 800f 80fe            ;  Wait for vpos & 0x00 >= 0x80 and hpos >= 0x0e
                                ;  VP 80, VE 00; HP 0e, HE fe; BFD 1
 0005f4b0: 0140 5020            ;  SPR0POS := 0x5020
 0005f4b4: 0148 5020            ;  SPR1POS := 0x5020
 0005f4b8: 0150 5020            ;  SPR2POS := 0x5020
 0005f4bc: 0158 5020            ;  SPR3POS := 0x5020
 0005f4c0: 0160 5020            ;  SPR4POS := 0x5020
 0005f4c4: 0168 5020            ;  SPR5POS := 0x5020
 0005f4c8: 0170 5020            ;  SPR6POS := 0x5020
 0005f4cc: 0178 5020            ;  SPR7POS := 0x5020
 0005f4d0: 019e 0776            ;  COLOR15 := 0x0776
 0005f4d4: 0140 503c            ;  SPR0POS := 0x503c
 0005f4d8: 0140 5044            ;  SPR0POS := 0x5044
 0005f4dc: 0140 504c            ;  SPR0POS := 0x504c
 0005f4e0: 0140 5054            ;  SPR0POS := 0x5054
 0005f4e4: 0140 505c            ;  SPR0POS := 0x505c
 0005f4e8: 0140 5064            ;  SPR0POS := 0x5064
 0005f4ec: 0140 506c            ;  SPR0POS := 0x506c
 0005f4f0: 0178 5074            ;  SPR7POS := 0x5074
 0005f4f4: 0150 507c            ;  SPR2POS := 0x507c
 0005f4f8: 0140 5084            ;  SPR0POS := 0x5084
 0005f4fc: 0168 508c            ;  SPR5POS := 0x508c
 0005f500: 0160 5094            ;  SPR4POS := 0x5094
 0005f504: 0140 509c            ;  SPR0POS := 0x509c
 0005f508: 0140 50a4            ;  SPR0POS := 0x50a4
 0005f50c: 0150 50ac            ;  SPR2POS := 0x50ac
 0005f510: 0140 50b4            ;  SPR0POS := 0x50b4
 0005f514: 01fe 50bc            ;  NULL := 0x50bc
 0005f518: 0140 50c4            ;  SPR0POS := 0x50c4
 0005f51c: 0140 50cc            ;  SPR0POS := 0x50cc
 0005f520: 0140 50d4            ;  SPR0POS := 0x50d4
 0005f524: 0140 50dc            ;  SPR0POS := 0x50dc
 0005f528: 0148 50e4            ;  SPR1POS := 0x50e4
 0005f52c: 800f 80fe            ;  Wait for vpos & 0x00 >= 0x80 and hpos >= 0x0e
                                ;  VP 80, VE 00; HP 0e, HE fe; BFD 1
 0005f530: 0140 5020            ;  SPR0POS := 0x5020
 0005f534: 0148 5020            ;  SPR1POS := 0x5020
 0005f538: 0150 5020            ;  SPR2POS := 0x5020
So our copper list is just a big mess of copper commands, moving sprites across the screen. If we count each of the 16x1 images as an independent sprite, we would get up to 3780 of them (another 1620 invisible ones). A new record? :-D
If you think there is not much DMA time left to do anything while the raster beam is inside the display area, you’re perfectly right! That’s why it is heaven-sent we can use the 16:9 mode with only 180 lines instead of 256 lines.
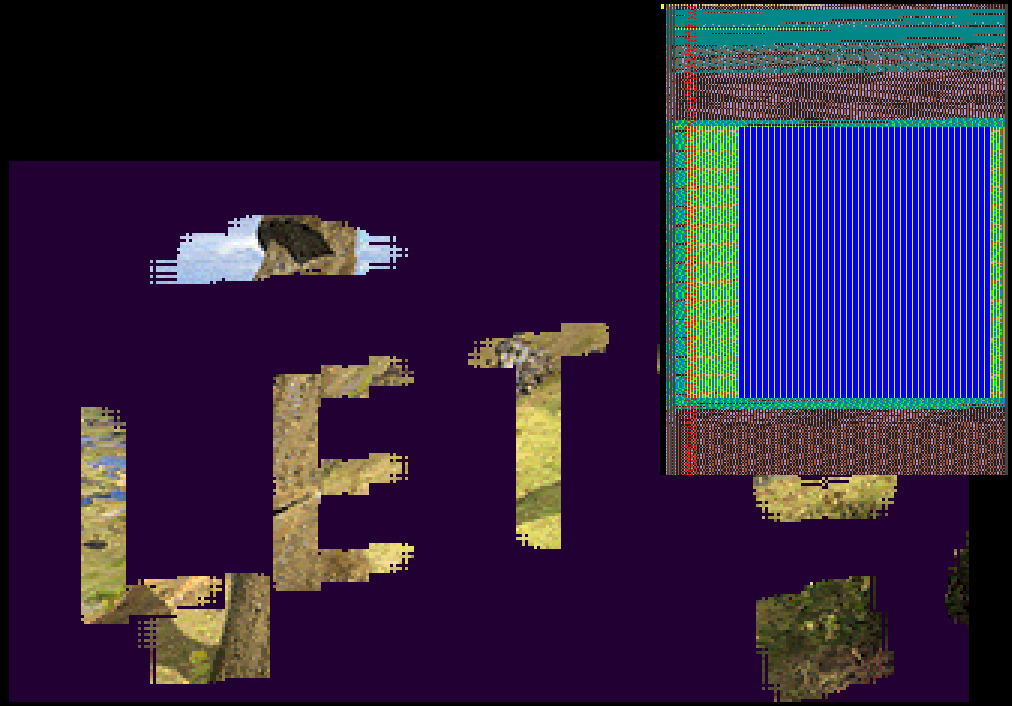
We need blitter assistance to move the data fast enough to get smooth scrolling.
Say, we want to scroll 8 pixel every frame. We can use a double buffered copper list with
alternating x = 0,16,32... and x = -8,8,24... positions. We can keep these
positions fixed (see copperlist above) and only alter which sprites to move.
The data of the font only needs to be moved column-wise one copper command to the left in each frame (it is a pity that the blitter has no modulo values for each word written, otherwise this could be done in one blit instead of 22 (as we don’t want to overwrite the position data)).
That’s the basics.
Each letter of the font consists of 64x80 pixels, thus 4x80 words. Each column is already
stored in a format for blitting directly into the copper list (hence, contains the sprite
position register address or $1fe (NOP) for a blank).
Identical columns are shared between letters to reduce memory requirements (23 KB).
When switching from the black background with the letters shining through to fully visible with the letters being solid, the font needs to be “converted” by swapping sprite 0 positions with the NOP and vice versa.
Just having a scroller would have been, uh, too boring.
If I had known that adding clouds and bubbles would be such a pain, I probably wouldn’t have done it.
Remember that we only have nine different 16x1 tiles? This is also the case for any other graphics we want to display along the scroller. This again limits what you can draw.
It is further complicated by the fact that the scroller moves at 8 pixels per frame. Always.
For the bubbles that only rise up and are not moving horizontally, this means that they have to be drawn in two different ways with 8 pixel offset. Unfortunately, seven of our our nine shapes don’t come as 8-pixels shifted versions! Still, the clouds have to look as similar as possible, otherwise you will get a flickering mess.
The clouds move in the same direction as the font, but they move at only four pixels a frame, thus we need four different images to make it happen (at 0, 4, 8 and 12 pixel offsets). The correct order and x offset within the image easily drove me crazy. Also, the cloud with the blank 16 pixel on the right side has to be drawn last to avoid the necessity to clear the buffer at the edge while scrolling.

These little graphics (remember we have one word per 16 pixel width) are either drawn with the CPU (with clipping for the clouds) or with the blitter (bubbles).
For the rotating boxes in the final version, I refrained from doing them by hand, but instead wrote program to do it.
For the sine curtain, the part calculates a table of all possible curtain positions for the 21 sprite positions. As with the hamburger sprite, the horizontal position would be limited to every second pixel, but this is compensated by having two different sprite images, offset by one pixel (the ridge could have also been 48 pixel wide instead of only 16, but that was good enough).
To create the curtain, 180 blits are performed by picking one of the rows from above table with two interleaved sine functions. This simple effect actually almost broke the frame rate.
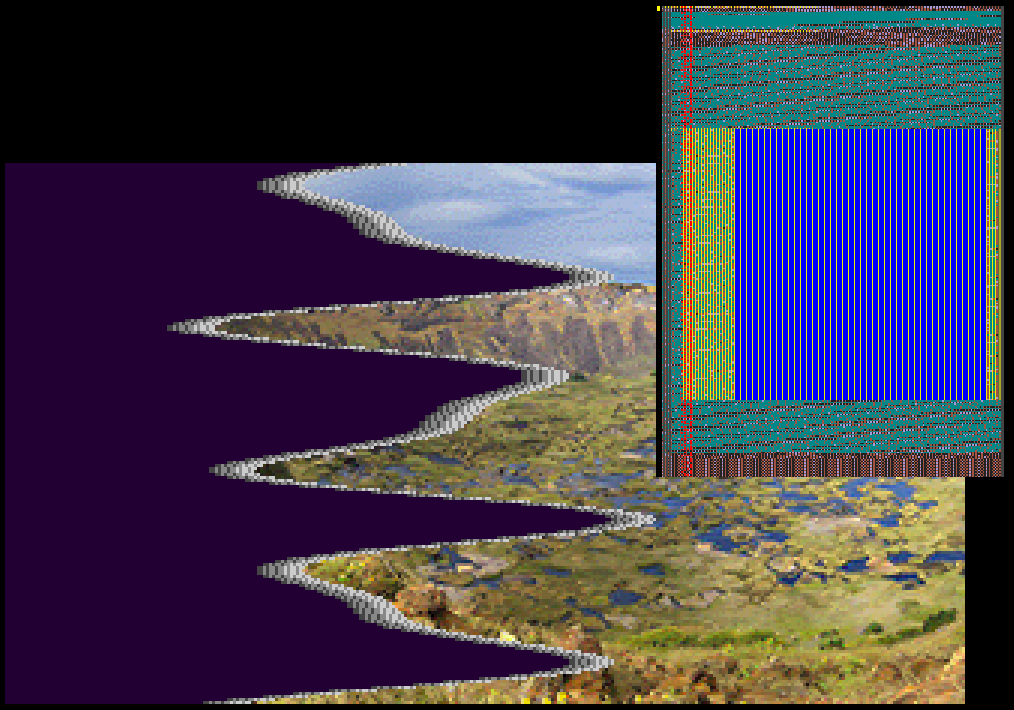
With the above knowledge, the plasmas and the blue dissolving boxes should be easy to understand and are left as an exercise.
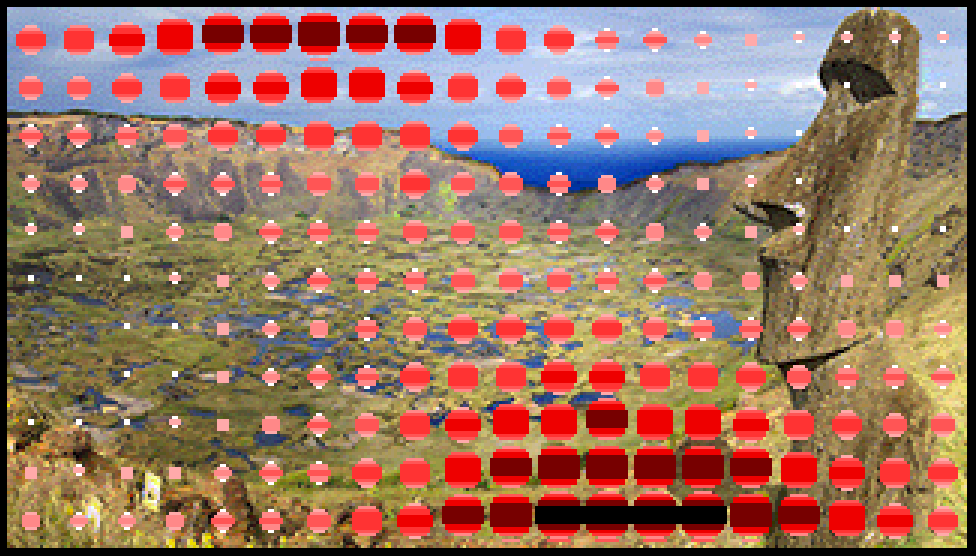
The scroller starts as monochrome version. That’s simply a monochrome HAM screen with the same line repeating using modulo.
The throbbing of the font (and other graphics) is created by just using different sprite images for the eight sprites. If you understood the technique I explained above, you’ll notice that the effect basically comes for free.
Then it switches to vertical gradients. A HAM gradient image line is selected and repeated over the whole screen (like above).
Then, the HAM gradient is applied without additional modulo. Because the gradient is only 128 pixels high instead of the full 180 (memory!), it moves up and down to make sure the sine scroller stays inside the “good” area. That’s the actual reason why there’s no extra stuff going on there – it would go outside the “good” area, and you would have seen corrupted graphics.
Finally, it switches to the scrolling Orongo crater on Easter Island panorama. The image is 640 pixels wide and 192 pixels high, taking up a whopping 90 KB of chipmem alone. I tried to make the image as seamless as possible because the image needs to be wrapping around nicely as line 0 meets the next line 1 at the right border.
The scrolling is not infinite, it’s a corkscrew and the further you go right, the lower the image gets, hence the extra 12 lines in the image data.
Then the curtain, then the plasmas, then the inverted font and the dissolving. And cut!
… before I can explain how the scrolling of the panorama actually works.
As I said in the intro, you cannot scroll a HAM image without getting fringes on the left part of the image. It would look this (uagh):
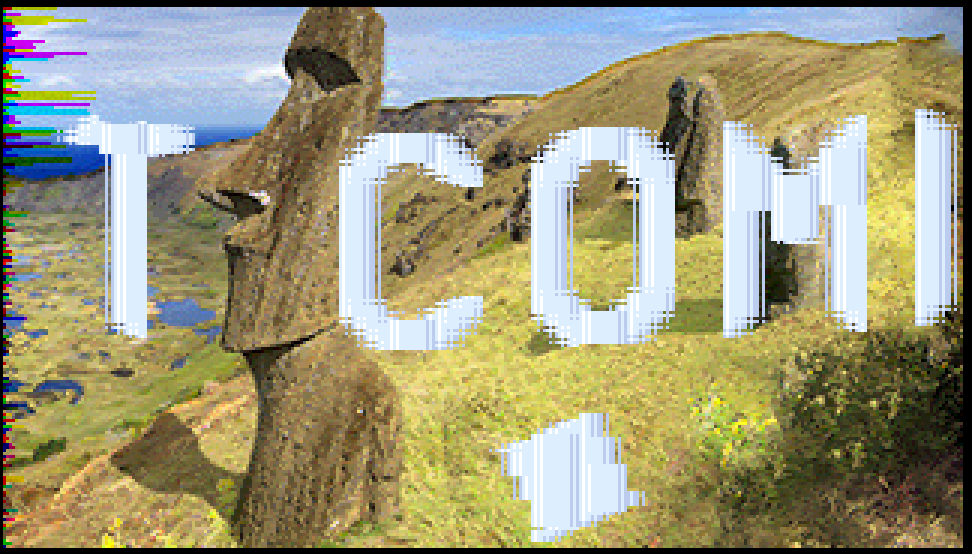
How come it doesn’t? If the line scrolls out on the left-hand side, we must make sure that it has the same colour value as if the pixel left of it was still there. HAM allows setting of the exact colour using the 16 index pens.
16 colours is surely not enough to fill a 180 pixels display. Fortunately, we don’t need different colours but only one that we can change each line. The aware reader might have noticed that setting color15 is also part of the copper list above (we could have used the background colour 0, but that would have looked funny!).
So it all comes down to drawing a vertical line with an index colour at exactly the first visible line and updating the 180 colours entries accordingly. As we don’t have double buffering here, the line must be drawn before the raster beam reaches the display area.
Also, if we just would be drawing the line, scrolling to the right would work nicely – until we wrap around where we will be presented by trashed graphics. We need to create a backup of the column we’re damaging, so we can restore it before selecting a new column. Then we can scroll in any direction at any speed without fringes.
Alas, where do we get the information which colour to set for each vertical pixel?
It should be easy to understand that we cannot examine every pixel and scan for the pixels to the left until we find an index colour or all three components set to determine its final value. Too slow, far too slow!
While you’re patiently watching the scroller effects building up, in the background your machine is eagerly calculating a 12 bit true colour image representation of the formerly 6 bit planar HAM graphics. This does take a couple of seconds (similarly this is also done in the Desert Cube Panorama scene and the SHAM parts, see below).
Though it would have been nice to have this true colour image in chip ram for fast blitting of the column colour information, the required 240 KB would have not fit in.
Fun Fact: The scroller at one point turns “You want MOAR!” into “You want MOAI!!”. You probably missed that :)
So that’s it for the scroller. Easy peasy. If you thought that was a complicated mess, keep on reading.
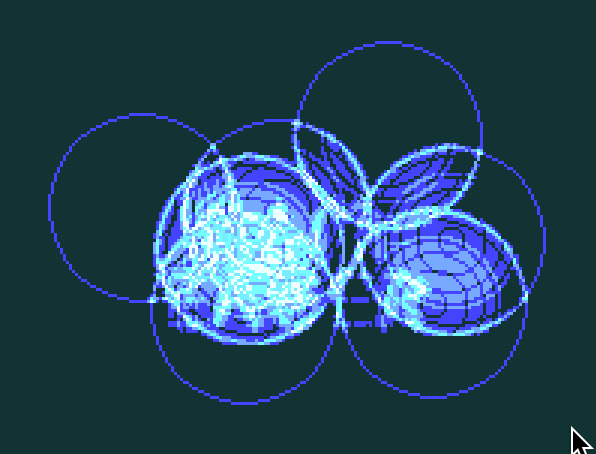
You probably noticed that the scroller takes lots of fast mem and chip mem. So before loading the next part with new music and similarly huge chip mem requirements, we need to have something that’s “light” on the resources.
Such as an eight colours meta ball effect. Meta balls are (in our case) just images that are added together. This is pretty common and easy when working with chunky pixels. But for 68000, chunky pixels conversion will surely not create an effect that runs in one frame.
We have a fast helper, the blitter. The blitter is rather versatile, and it can be considered a fast streaming math unit. We already have seen shade bobs that consist of a simple add or sub 1 routine.
However, we can build up adders in more complex ways (see Sacsayhuaman part). In this case, the blitter is used to add a four colours 64x64 bob to an existing eight coloured (mostly black) background.
We don’t want the graphics to turn to crap by wrapping around when the addition overflows (already three balls overlapping could cause a result of 3+3+3 => 7), so we need some sort of saturation.
For this part, I created a five pass blit with semi-saturation
(the lowest two bits will still toggle, thus the colour will switch between
7,4,5,6,7 instead of staying fixed at 7, but this give a nice “noise”
effect when selecting the colours in the right way).
c0 = a0 and b0d0 = a0 xor b0c1 = (a1 and b1) or ((a1 xor b1) and c0)d1 = (a1 xor b1) xor c0d2 = (b2 xor c1) or (b2 and c1)(a being the ball image, b the background, c the carry mask and d the destination).
I think this is a good compromise – a normal blit of a bob with this depth would have been three passes already (ABCD). Note that the balls needs to be erased, so a there’s a clearing pass too (interleaved bitplanes).
As we don’t have any copper magic going on in this effect, we can use the copper to drive the blitter to make optimal use of the parallelism between CPU and blitter (remember that we want to load the next part in the background).
The palette was chosen in a way that the first three colours are normally the same making the meta balls invisible when not overlapping (I changed this for the final version where each meta ball is still visible as a circle at least). The palette fades and flickers with some blue noise.
Fun fact: When running this effect standalone, it worked nicely for the seven 64x64 meta balls and the 96x46 logo, but when run inside the trackmo and loading from disk, the framerate dropped below 50 FPS.
Why did that happen?
When blitter hogging is disabled, the blitter yields the bus to the CPU every fifth cycle, slowing down its speed by up to 20%. When many meta balls were active, the framework’s background loading thread took away so many blitter cycles that the blitter did not finish within the frame.
Hence, I had to turn on blitter hogging after drawing the first meta ball. There were enough free idle cycles in the clearing section of the frame anyway. Once the blitter was finished for the frame, the remaining cycles were still spent on the background loading.
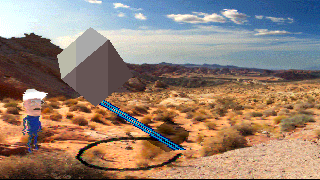
Brace yourself. This is going to be a wild ride.
We already have seen how we can create a scrolling HAM screen without fringing in the HAM Scroller part.
For the desert (640x180), I wanted to have a rising heat wobble like effect.
This meant that would have to scroll each line of the image independently
a few pixels to the left or right (using hardware scrolling with BPLCON1)
Who says we can only draw one vertical line to fix the fringing? Not two, not three, but four lines (and thus index colours) are used to make both the scrolling and the wobbling work.
As we both wobble and scroll the whole screen, we might need to fix
the modulo values at each line. Not just a few cycles are spent on
updating the BPL1MOD, BPL2MOD and BPLCON1 values for 180 lines.
Now, I need to explain why the image is split into two parts: The top part consists of 116 lines, and the bottom part for the remaining 64 lines. In this part I wanted to draw something onto the HAM image.
For drawing something I would need at least double buffering, maybe even a third one, if I wanted to avoid an additional pass to save the damaged region before restoring it.
A quick calculation of the chip memory requirements rises to 169 KB for two buffers or 253 KB for three buffers. A no-go.
Because I only wanted to draw in the lower part of the image, I wouldn’t need double buffering there. Also, for the shadow drawing effect, I would need a certain fixed palette (see below) and that would degrade image quality.
Thus, I split the image up, with the top part using single buffering (55 KB) and Sliced HAM. This means that up to 11 colours of the palette are changing each line (plus the four used for the scrolling). Look for the jagged yellow edge in the DMA view at the end of the chapter to see how many palette entries change per line.
The lower 64 lines use up 90 KB for three buffers. 145 KB of chip memory for the display is acceptable.
Why 64 lines? Because (640/8)*64*6 is less than 32 KB and by having
the drawing buffers for the bottom directly behind the top part, I can
switch buffers by just changing the modulo values to skip the 64 lines
of the first buffer (there would not be enough time to reload six
bitplane pointers, change the palette, update modulos in the
horizontal blank between two lines).
Also, 64 is a nice power of two.
As already mentioned, for the scrolling we would need a true colour representation. For the top part, we will only need about 73 KB for the left half of the picture only for scrolling, while the bottom part needs the full 640 pixels width converted to true colour (80 KB) to be able to paint on it.
I wanted the shadow of a cube on my HAM image. Normal people just would use extra-half-bright (EHB). Not stupid me, I wanted to stick to HAM.
How does EHB work? The second 32 colours are just shifted right by one bit halving their brightness.
Uhm… why can’t do the same for HAM? Well, in fact we can.
We can halve the intensity of the HAM modifying pixels by simply
copying bitplane p2->p1, p3->p2, p4->p3 and clearing p4.
Unfortunately, we also have index colours. What happens if we halve their values? The colour gets mapped to a different palette index usually causing visual glitches.
Damn. Or, could we… could we just choose the index colours in a way that halving the index would not cause harm?
We can. It’s a compromise, though.
In an optimal world, the bottom part has the palette chosen in a way that the following index halving steps corresponds to the palette value halving, too (or at least is close enough).
15 ->  7 -> 4 -> 2 -> 1 -> 0
       9 -> 4 -> 2 -> 1 -> 0
      11 -> 5 -> 2 -> 1 -> 0
      13 -> 6 -> 3 -> 1 -> 0
This is rarely fully achievable. Thus, we limit the paths to the following steps and make sure that we don’t pick index colours during HAM image conversion that would cause artefacts when halved:
15 -> 7  -> 3  -> 1 -> 0
13 -> 6 (-> 3)
11 -> 5  -> 2 (-> 1)
 9 -> 4 (-> 2)
For the desert image, this palette is chosen by my HAM converter:
$ca8 -> $654  -> $322  -> $111 -> $000
$db9 -> $654  -> $322
$c85 -> $642  -> $321 (-> $111)
$237 -> $113 (-x $321)
You might wonder why I didn’t list index colours 8, 10, 12 and 14? We need to scroll and wobble the bottom part, too, remember?
The intro effect for the scene is just there to give the background calculations a head start (true colour images, 3D cube calculation). It’s a standard display modulo trick, only made a bit more complicated by the fact that the screen is (partly) sliced ham and thus the palette must be correct for every line.
The cube itself consists of six four colour sprites, therefore has a maximum width of 96 pixels. As a cube never shows more than three sides at the same time with normal perspective projection, a sprite is perfectly fine for this purpose.
The whole effect was always very close to the frame time limit, and a lot of optimization went into various parts, and the cube rotation one is no exception.
The vertices of the cube are not calculated via standard matrix multiplication, but
via linear combination of the three axis vectors (1,0,0), (0,1,0) and (0,0,1)
that have been rotated around the three axes. The eight corners are then derived
from the three rotated vectors. So only three coordinates are rotated with an
optimized formula instead of eight full rotations.
Backface culling is also done by simply taking the normals of each face and comparing the Z coordinate. It is lucky that the normals are equivalent to one of three rotated axis vectors (or to negated version of those).
The lighting/colouring also uses the normals for looking up the colours in a UV texture-map. The cube could have been completely flat shaded, but using sprites we get the possibility to use three different sets of colours for each side, so why not.
Coordinates of invisible planes are not even projected from 3D to 2D to avoid unnecessary divisions. (I am not using tables here – I wanted accurate calculations, otherwise using subpixel accurate line drawing would not have made sense!)
The main change, however, that made this effect work out nicely, was this one: All of the 3D calculations are done asynchronously into buffers ahead of time in the background to have leverage when frame time runs out temporarily (due to bigger cube shadows, laser updating or scrolling).
The sub-pixel accurate blitter line drawing routine is based on work by Kalms/TBL.
It is made sure that lines are drawn in an optimal way that lines are only drawn exactly twice into a line drawing buffer and with the filling steps in between to the two planar bitmaps. The copper list even consists of subroutines to paint or remove the same lines, so that no expensive line drawing calculation needs to be done twice.
The planar bitmaps are then converted to sprite strips using further blitter passes.
All these blitting steps are part of a copper driven blitter queue that happens before the display starts and the copper gets busy with other stuff. This is a very tight schedule. There is another copper driven blitter queue at the end of the display area for stuff like scrolling or scorching.
As seen above shifting the planes down will create a half bright shadow. However, we still got the fringing problem on the left and right edge of the shadow.
Fortunately, the outline of the shadow is a convex shape, without holes or gaps. Thus, we are drawing the lines of the shadow with a CPU based Bresenham algorithm tracking the left and right edges (minimum and maximum).
The lower image shows the shadow without fixup and resulting HAM artefacts, the top one shows the CPU drawn fixup lines in wrong colours to make them better visible.
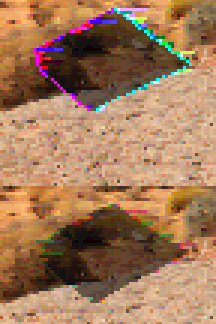
We are using the minmax information to fixup the left edge (by halving the colour value from the true colour image), and the right edge (by restoring the original colour value) – but only after the blitter has finished doing the bitplane shifting operation (but before the shadow gets displayed)!
The timing is very crucial, so after a lot of different attempts reordering the code, I gave up and used a copper interrupt to make sure it gets done at exactly the right time. You may notice that the Party Version of HAM Eager sometimes shows HAM fringes around the shadow, while the Final Version does not, and this formerly bad timing is exactly the reason.
We can reuse two index colours we had reserved for the wobble / scrolling fixup as the colour is only used in the first four pixels of the screen (this also means that the cube cannot leave the screen to the left, because the shadow would then become corrupted).
This is the result with the correct colours:
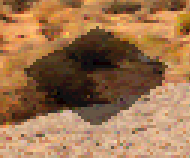
No fringing, just a perfect shadow.
With six sprites used for the cube and hardware scrolling enabled at a view of 320x180, we cannot use either sprite 6 (OCS hardware bug: sprite 6 would be “half-loaded” by DMA) nor sprite 7 (no DMA slot available).
But the laser might not even need DMA. Actually, we don’t want to have DMA on this sprite. It’s a laser! It looks the same all the way down. We just need to use sprite repositioning as we did with the hamburger.
So we add one auxiliary copper command slot per line where we first load the
control words and data words (SPR7DATA) to arm the sprite. We can then update SPR7POS
to move the laser into the direction we want (Bresenham again).
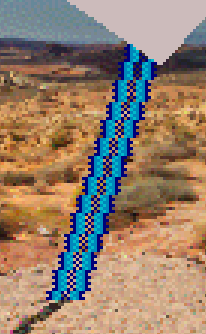
However, if we do not need to update SPR7POS, why waste this slot for nothing?
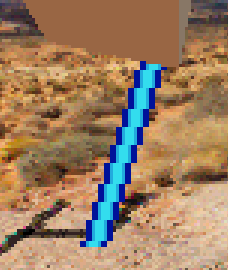
Due to the 2 pixel horizontal resolution, the laser looks a bit coarse.
We might enhance its graphics by adding dither by xor’ing SPR7DATB with
a static pattern. It’s okay that we don’t update the dither when we move
the sprite, nobody will notice.
This is how it would look like without dithering:
We should not touch SPR7DATA (this arms the sprite!) because otherwise,
we would not be able to simply disable the laser by removing the write
to the one copper command where SPR7DATA is written, but instead we would need
to remove all the writes to SPR7DATA all the way down.
Note that the rotation of the cube has been fine-tuned so that whenever the laser is about to turn on, the cube has one corner facing down and stays that way.
The tumbleweed is simply reusing some of the cube sprites by reloading the sprite pointers and changing the colours using the aux copper command slots (one write per line). Of course, the tumbleweed is only available as long as the cube is positioned higher than the highest position of the tumbleweed.
Unfortunately, both tumbleweed and laser cannot be active at the same time – they’re using the same auxiliary copper command slots (that could have been changed, but then I would have been tempted to burn the tumbleweed if it hits the laser and that would have increased the complexity even further).
The laser alone would be a strange effect on its own if it would not do anything to the ground.
The part contains an algorithm for an online, fast HAM pixel manipulation method. The 12 bit true colour information is enhanced by the information, which component was modified at the pixel or if a pixel was set by an index colour. The algorithm indeed tries hard to pick a good match for the pixels left and right of the manipulated space and also updates the true colour information so that scorching marks and cube shadow can peacefully coexist.
Several lookup tables are used:
$0000rrrrggggbbbb format into
an interleaved $0000grbgrbgrbgrb format, as this can be used to find colour
distance with little error by just subtracting the values.The code is really complex, but the result is okay for most of the pixels.
After the screen reaches the right edge, the plasma is copied from fast memory to chip ram, overwriting the left-hand side of the image now no longer visible.
The plasma itself is an animation where only red and green components are changed every second pixel – blue is unused and thus can be used to add a magenta glow by picking a varying blue intensity for the left edge fixup colour.
Similar to the cube shadow, the plasma outline is drawn with the CPU using a modified Bresenham ellipse algorithm (with perspective correction). It is then filled with the blitter (similar to the cube shadow).
The four bitplanes plasma data is cookie-cut onto the screen, while planes 5 and 6 use a fixed blitting pattern to create the alternating red/green pattern. Finally, the fixup is applied to remove the fringes on either side of the plasma.
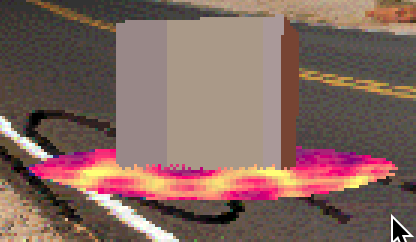
Just to give a glimpse of the complexity of this part, I will describe what the main loop does (3D calculation is done in the background).
The DMA view of the scene might already give a hint that there is something complex going on.
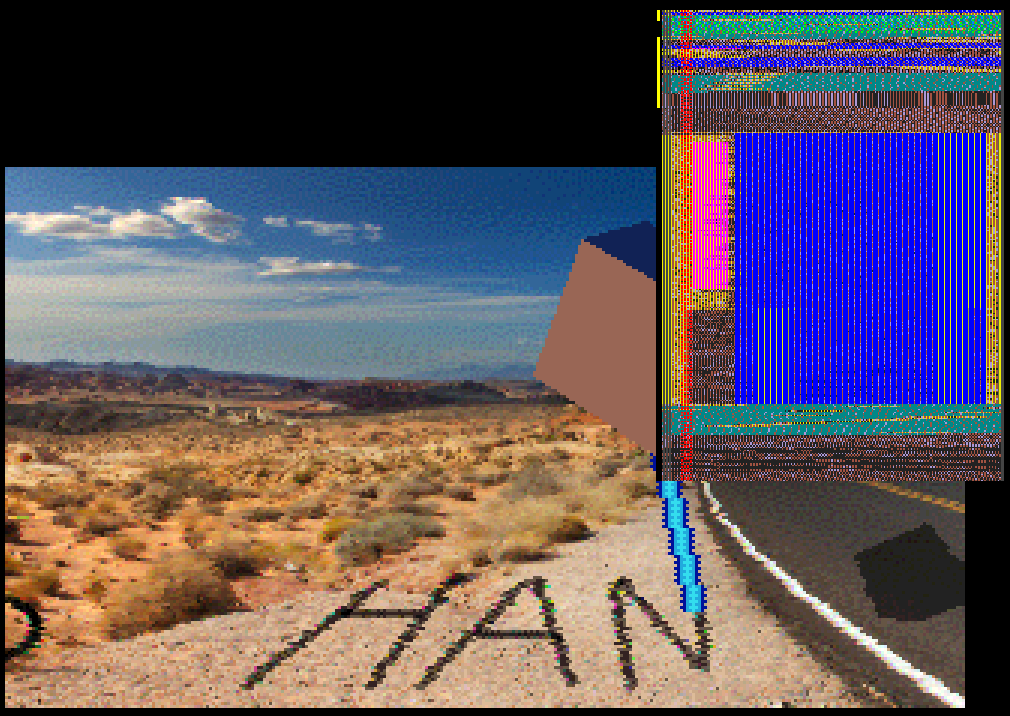
So that’s it for the most complex part in the demo. I had parts of it already in March 2020, but it took a year to get half-way working, and another month for yet another rewrite for the Final Version.

Again, after a high-memory part, a short transition part that simply shows some text bobs and a backwards running clock (4 KB on disk).
Notice that the display has depth of four bitplanes (16 colours) while it only uses two bitplanes in memory. Both the shadow and the 3D effect are achieved by hardware scrolling by two pixels.
The dissolving effect is again a modified floodfill and eat-away routine.
Sacsayhuaman (or Saqsaywaman) is a place close to Cuzco, Peru. It is known for an ancient fortress with stone walls made of huge, perfectly carved stones. The name Sacsayhuaman is close to the expression “Sexy Woman”.
Did I really need to explain the pun?
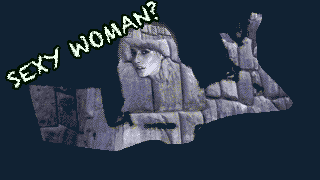
The effect starts by drawing an outline of a woman looking into a laptop. This is done using additive and subtractive metaball brushes. Yes, metaball blitter code AGAIN.
However, this code is special because it does not saturate at the highest colour, but instead does a three bit addition to a four bit value and compares this to another four bit value (the picture) to saturate it with it.
This is one of the most complex blitter operations I ever wrote with 23 blitter passes per bob.
Then the face (painted by Prowler) is also rubbed through. The face is stored as XOR image to save some disk space.
Finally, almost the whole screen is painted over again.
The Sexy Woman and Saqsaywaman texts are sprites. They are much larger than the maximum 96 pixels (for six sprites) because they are recycled on the way down.
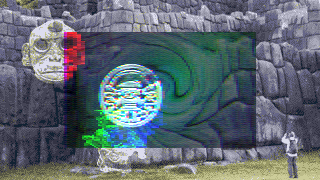
The window in the center of the screen is in HAM mode. But don’t be fooled: only four DMA bitplanes are active on the whole screen.
This mode is called HAM7 and is only available on OCS/ECS. It tries to activate seven bitplanes which causes only four DMA bitplanes to be active while planes 5 and 6 data is still output and can be set to a constant word using the copper (or CPU).
The HAM window uses the copper to change the plane 5 and 6 data to a fixed pattern for
$RGBGRGBGRGBGRGBG while outside only the 16 index colours are used ($0000000000000000).
Outside the HAM window the ghosts use a normal saturated metaball routine. But inside the HAM window each ghost only adds a certain combination of red, green or blue components. You might get an idea that the clipping between the different locations is not trivial.
The green component is changed every second pixel while red and blue are only modified every fourth pixel, hence the lower horizontal resolution (Bifat/TEK used a visually better non-uniform pattern in Hologon!).
If one would deactivate the HAM window, the image would look this way:
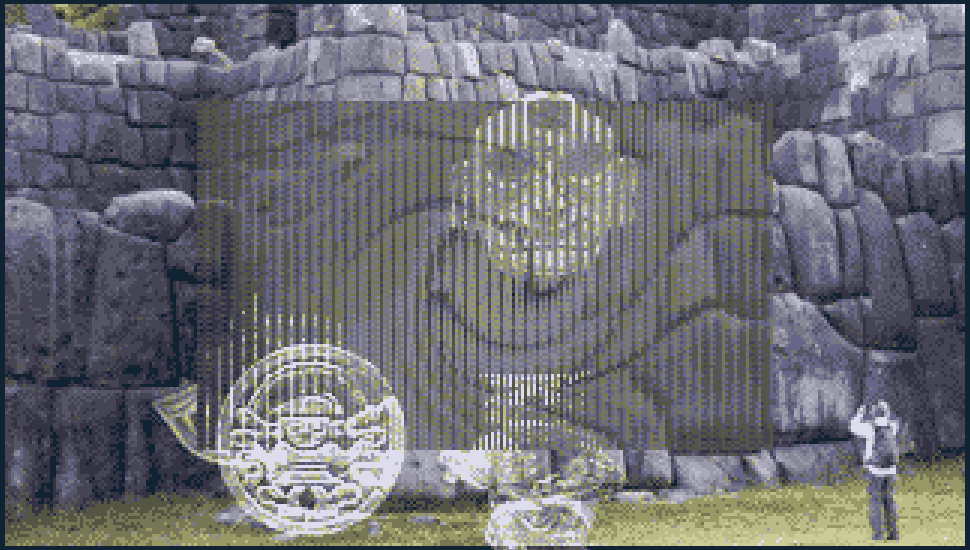
Here one can easily see the vertical stripes where red, green or blue components are changed.
If there wasn’t a code path to fix this impossible mode for AGA, you would be seeing a similar image in the demo but with some glitching as the unset bitplane pointers run through the memory.
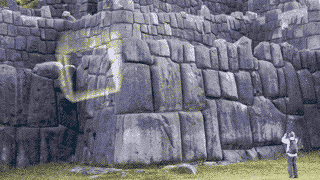
This is a combination of drawing a wireframe cube (with hidden surface removal), blurring the cube with the fire (smoothing) algorithm and then applying the result back as meta ball bob onto the image.
Nothing special, but just reusing and recombining things.
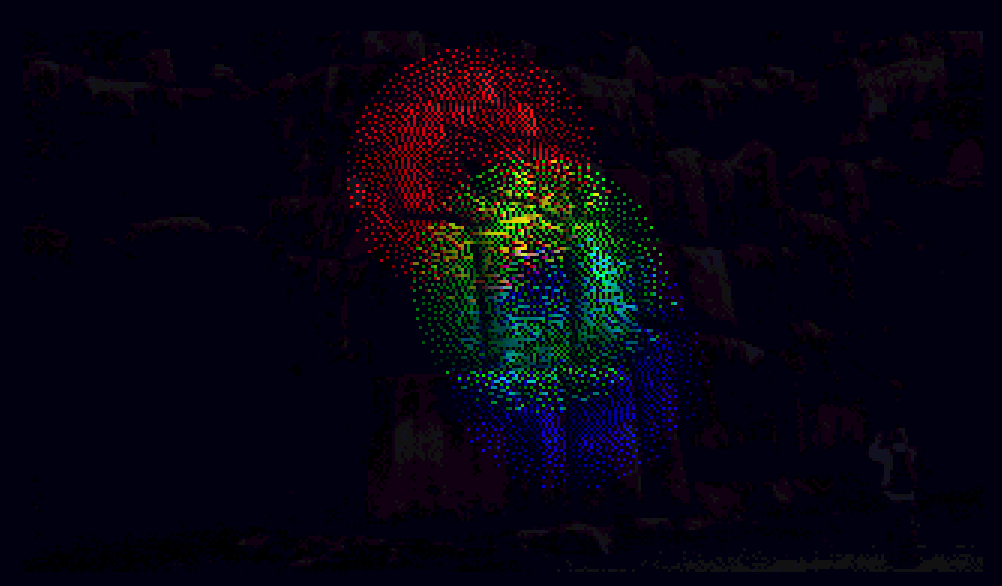
What would happen if you just turned on HAM for a normal indexed coloured image and painted something into plane 5 and 6 to turn the index colours into red, green and blue modifying colours?
It would look damn ugly! Yeah, it might cause some mixing of colours, but is also prone to fringing.
I tried several algorithms to reduce the fringing and have an equal distribution of colour where the balls meet, but it didn’t work out or became too slow.
I left the effect in because it was frustrating enough for me to code.
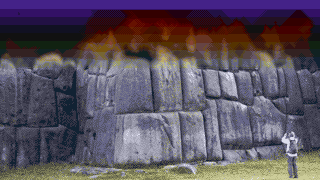
Using 21 blitter passes, I constructed a (a4+b4+c4+d4)/4 operation
(adding 4 bit + 4 bit + 4 bit + 4 bit to a 6 bit value),
which will effectively smooth out the surrounding pixel.
With a y-offset the image would move up, creating a fire like effect.
For the record: I tried to create a program that would create the optimal combination of blitter passes, but that turned out harder than I thought. The number of inputs and outputs is just too high and the limitation to three sources and one output made things complex. I put the resulting minterms into a logic circuit solver and tried to create the blitter passes from there on, but the don’t care bits were wrong and I wasted a whole week.
Though it might not be the optimal solution, the manual approach was exhausting but yielded a correct result.
The 21 passes are so slow that only an area of about 320x64 pixels can be smoothed within two frames with the blitter.
Remember that the blitter has only three sources to combine to a third, and a total of 16 different inputs have to be combined in various ways to get the resulting 4 bit value. It should be clear that the CPU, when using registers, might not need to read the same values over and over again, but I guess the blitter is still much faster on 68000. Also, you don’t get the shifts for free with the CPU.
We have seen the fire effect many times using chunky-to-planar (C2P) conversions on the Amiga, but often only on high-end AGA machines (in 1x1) or just 2x2 on smaller machines.
I’ve never seen this effect on OCS 68000 running in 1x1 in 25 FPS before.
One of the tricky things about this part is that each sub-effect sometimes needs a different screen memory layout or size (there is an extra invisible border when I was too lazy to do the clipping) for the picture displayed.
Sometimes, triple buffering is required, sometimes double buffering is enough. Sometimes the action takes place in the planes 1-4, sometimes only in plane 5 and 6.
Nothing of this can be seen when watching the demo. It was still a pain.
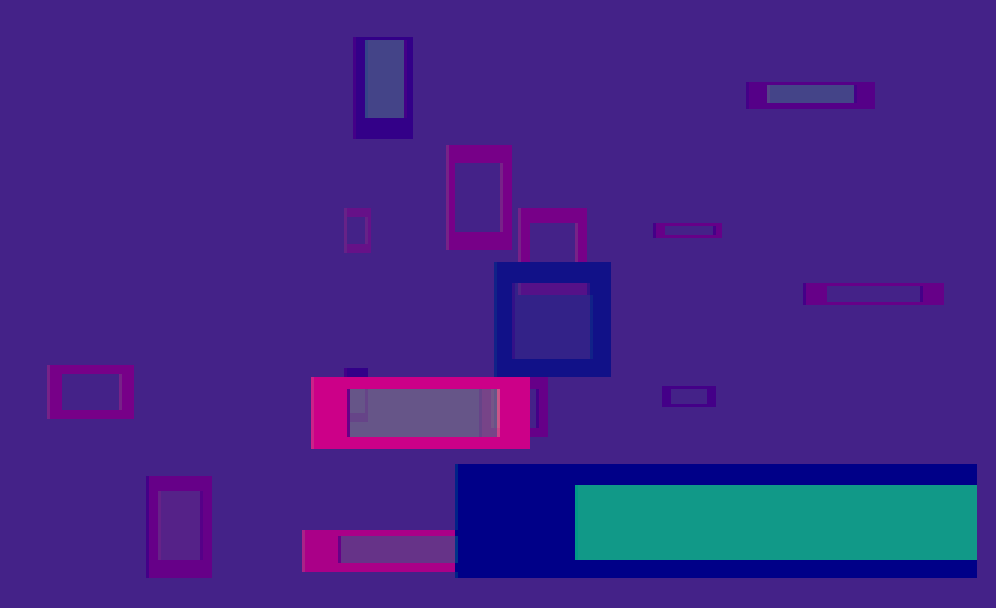
I originally wanted to have a HAM tunnel where I used the fringing not as a bug, but a feature – remember that if you only use HAM pixels that only set component (e.g. only green), the other components (red and blue) stay the same until they are changed.
This is a poor man’s horizontal fill operation.
Alas, I did not finish the HAM tunnel in time (I was stuck because the ellipse drawing was too slow to be useful).
However, I really needed some transition effect to be able to load the next chip memory hungry part.
So the Box Zoomer is a HAM filling effect where the whole screen
has a blue component set to $8 whereas red and green can be
set as you like ($rg8)
Thus, this is a 256 colour mode with six bitplanes instead of eight and automagical filling of horizontal spans.
Painting a box in such a mode has the nice feature that you only need to
draw the left edge (paint one vertical line for one component and
another one for the other component) and the right edge (restore
the $428 background colour by drawing a vertical line with an index colour).
Works nicely for one box, but as soon as boxes overlap, maybe even with transparency (added in Final Version), things get a bit complicated.
With the compo deadline approaching, I went the TBL route and wrote a Java program in Processing that would render an animation of flying through a space of boxes and convert it into a good data format that would both be compact and fast enough to render.
Because yeah, we still have to modify up to six bitplanes per (uninterrupted) edge.
The 362 frames of the animation in the Final Version with the translucent inner windows get need about 282 bytes per frame on average (100 KB total), getting compressed down further with Doynax to about 64 KB on disk.
If you wondered why the effect ping-pongs, there’s a simple reason: We only got disk space / memory for about 362 frames of precalculated animation and two music patterns are 480 frames long.
So we go backwards for 59 frames and then forwards again and end up at exactly 480 frames for the scene that we needed to transition to the SHAM Greetings part.
I could have rewritten the code to used copper driven blitter, but I was too lazy, and the CPU driven blitter was fast enough (though just so).
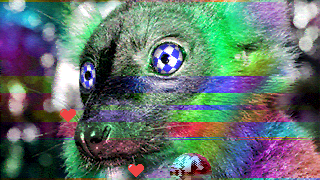
I wanted to have a very colourful image to show the capabilities of the HAM mode. Showing off some other fading in and out techniques (merely a slice, not full screen, but running at 50 FPS).
I chose the photo of a red ruffed lemur (Red Vari) from Madagascar because I had fond memories of the place.
I can assure you not being on drugs when coming up with the idea to have an Amiga Boing Ball animation inside the eyes.
Many attempts of moving and scaling the image were necessary before one of the eyes was 32 pixels wide and the other one 16 pixels and one was at a 16 pixels boundary. This is nothing you can see, of course, when you watch the demo. It does reduce memory and blitting requirements, however.
To be able to fade in and out on a per-line-basis, I would have to modify the palette for every line anyway (remember how the HAM fade algorithm works). So I could use sliced HAM anyway for the whole image, increasing the visual fidelity by picking 15 new colours every line.
So my HAM image converter created the sliced ham image, but with a speciality: it made sure that the left and right edge of each eye would start and end on an index colour (it reserved 5 colours per line for the eyes and 11 for the rest of the image).
This would allow me to fade or modify the eyes independently and/or pick an optimal palette for displaying the boing ball animation.

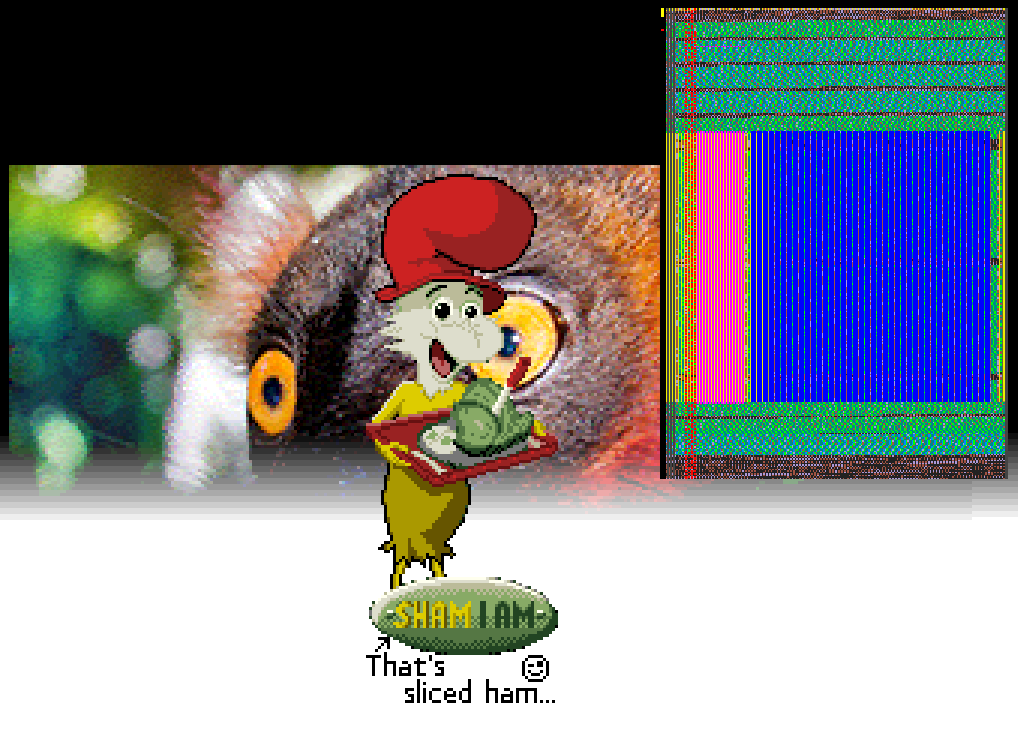
I’ve been watching the Netflix series Green Eggs and Ham based on a book by Dr. Seuss with my son. I found it excellent, and I give a strong recommendation to watch it, even for adults.
The protagonist/antagonist is called “Sam-I-Am” and enjoys eating green ham (sliced, of course!) and green eggs.
First time after so many years, I pixelled the 64x180 in 16 colours in GraFX2 from a hand-drawn scan.
The intro with the eyes in the darkness jumping into place is again for the background threads to do its work: Converting the monkey image to true colour and overlaying the greetings onto it. The greetings are stored in 4-bit anti-aliased grayscale chunky format, and they are coloured in HSV colour space together with a shadow to make them more readable.
The colour fading inside the eye while blinking is real-time, it’s not a pre-calculated animation, and it fades in from black to red to yellow.
With the white flash, the rest of the image is faded in from white to the original photo itself. The algorithm is similar to the full screen fading, however, it is applied to a small moving window and thus, every line gets its own palette modification.
There’s not much time left in this frame:
The inverting of the HAM image is done by simply inverting all HAM pixels (not the index ones) of the image and inverting the palette, too.
I had more plans for this effect, but the memory layout did not allow this. I already had spent some time reducing the memory footprint and didn’t want to go back.
The lens is a 48x48 sprite, with 21 different zoom levels, pre-calculated with a Java program in Processing.
Every line, 14 colours (additionally to the 15 of the HAM image!) are set by the copper, to represent one zoomed pixel out of the true colour image. So the lens only has a horizontal resolution of 14 pixels (but up to 48 pixels vertical) resolution. I tried to use dithering to compensate for that, but it is still a candidate for the unreadable text award.
I only just realised the lemur part was the greetz, I was transfixed by the eyes :D :D (Antiriad)
To make things worse the copper is not fast enough to set 29 colours before the display area. Thus, the more the lens moves to the left, the higher the probability that you will see the colour from the last line instead of the supposed one. Luckily, the vertical resolution is high enough to almost hide this small glitch.
As a side note: The lens looks better on AGA because 64 bit bitplane DMA is enabled there, allowing twice the copper moves in the DMA area, reducing this glitch.
To avoid the copper sucking all DMA time, only the lines where the lens is active will use 29 colours, the other lines will have copper jump instructions to skip the unnecessary commands.
For all 14x48 pixels, the CPU determines an offset into the true colour image, reads it value, sends it through a lookup table for increasing or decreasing brightness according to the current lens image alpha channel and sets the colour into the copper list.
This is the CPU intense part of the effect. Given there is not much DMA time left inside the display area, filling the lens almost takes a large portion of the frame time at maximum size.
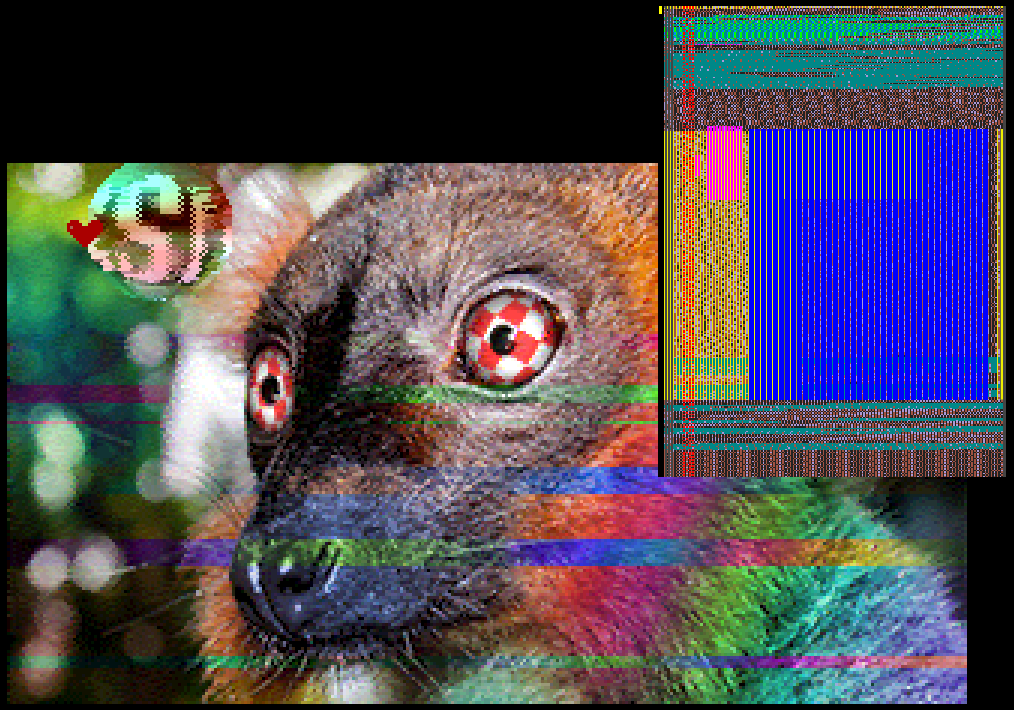
Look at this! All this yellow copper stuff! The Sliced HAM copper lists with the space for the lens palette update take up a whopping 42 KB of chip mem alone!
The lens reserves six sprites, which leaves us with two more. These are reused, if required, to show up to four hearts at the same time. As only one colour is left, the hearts are mostly monochrome, but there is a small highlight that takes whatever colour is there currently in the lens.
Fun fact: Cinco Loco, the music playing here in this part has 5/4 time signature also due to being closer to a heartbeat, and the hearts are pulsing to the beat of the music.
It occurred to me that I could permutate the hues of the image by simply swapping
the order of the red, green and blue ($RGB -> $RBG / $GRB / $GBR / $BRG / $BGR).
This order is defined by the bits in the planes 5 and 6. For example, if you swap planes 5 and 6, you will exchange the red component versus the blue. You just need to make sure that the index colours stay in the lower 16 slots.
Again, you need to have a modified copy of the 180*15 palette values for each permutation, too. Excluding the eyes, of course. Another 28 KB of fast ram gone.
The bars are just blitted into p5 and p6 from either p5, p6 or a
pre-computed p5 xor p6 buffer.
To save CPU time, one can restore the 15 colours to the original ones by blitting directly into the copperlist.
In the second mode, the bars are just no longer cleared, painting larger areas in different colours. There are some minor flickering line glitches from the double buffering, but there was no enthusiasm to fix that. See it as temporal dither instead :)
Each eye animation consists of twelve frames. Yeah, I know, pre-calculated shit, but still work to get right.
They are just blitted with cookie-cutting into the planes 1 to 4 (no double buffering here, so be quick!), and planes 5 and 6 (double buffered), but it may only happen after the bars have been blitted!
Then the five index colours need to be updated on a per-frame basis. The palette data for the two different animations uses 11 KB, while the graphics itself are just 25 KB.
After switching between the animations a background task does palette and graphic data permutation (similar to what the hue bars do) to create green/white and blue/white boing balls and differently coloured.
After fading out the lemur except for its eyes, the bottom half is turned into a four colour hires display (using the same hardware scrolling trick for the shadow as in the Sexy Woman transition).
There’s nothing spectacular happening here, but I hope that some people were able to understand the Variform joke.
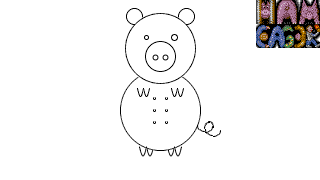
Technically is a simple loading screen with eight shades of grey.
The module with Jonna singing is about 50 KB.
The drawing is sub-pixel accurate and makes sure that the new pixel is never lighter than the one that’s supposed to be set.
Everything is sin/cos here, even the Dubyas and the piggy tail.
This is the end, my friend…
The last part starts with various XOR carpet patterns. It is derived from a program that I wrote on my first computer, a ZX Spectrum at the age of eight. Yeah, I really do remember how it looked like and how it worked, more than 35 years later.
Back then I generated the pattern by iteratively drawing diagonal lines with a certain STEP (y increment) from both sides of the screen. Where the lines met, they were xor’ed out. Then in the next iteration, I changed the step to a different value and complex patterns appeared.
This is more or less how it works in the endpart 35 years later.
I was too lazy to create a blitter routine, so the xor patterns are just continuously processed using the left-over time for the background task.
Thus, the pattern updates faster on fast machines :)
It’s just a randomly generated maze, drawn with the CPU. It’s extended to the right when the cork-screw-scroller scrolls the left part out.
The maze is filled with the similar floodfill routine I already used in the Floodfill part in the beginning. This time, however, no feedback history buffers are used.
However, the flooding is double buffered. This is used to check how far the water has run already by doing an A source only blit (with D channel disabled) on the rightmost 16 pixels, to check if the water has arrived. If so, it moves the scanning position to the next 16 pixel column. This position information is used to regulate the speed of the scrolling.
Then it tracks if the water is still flowing at the last known 16 pixel column by checking the differences between the current and the last frame (blitter xor operation, again checking the blitter zero bit).
If it has stopped flooding because it ran into a dead end, it will try to blow a small hole into the wall to get it flowing again (unfortunately, this only seems to work 90% of the time – I have seen YT recordings where it just stops).
Three little 16 colour sprites are wandering around the maze in a random walk.
If they touch the water, they explode and respawn. If they are not exploding, you have been using an emulator with sprite vs playfield hardware detection disabled (shame on you!).
I was thinking of adding a score counter for how many of the worms would reach the other side. Would have been fun, I think.
Perhaps the magic would last, perhaps it wouldn’t. But then again, what does? (Terry Pratchett)
I could probably write even more about the tooling around this demo, about the ham converter, the disk image building tool, the harddisk version, all the converters and prototypes I wrote using Processing.
These 90 KB of text already were half a torture to write down. So I’ll leave it at that.
Please excuse me as I sign off. Leave a comment, will ya?
Chris ‘platon42’ Hodges, chrisly(at)platon42.de
Not all of the information may be accurate as I stopped updating it at some point, but it really helped me plan things out.
; Partname     | Runtime | Pt | Chip Hunk . Dynamic . Total | Fast Hunk . Dynamic . Total | Disk Space |
; Eager Beaver |  2:24   | 19 |                      175 KB |                        1 KB |     103 KB |
; Colorbars    | ~21s    |    |     27 KB      0 KB   27 KB |      6 KB      0 KB    6 KB |       6 KB |
; Floodfill    |  18s    |    |      8 KB    113 KB  121 KB |      1 KB      0 KB    1 KB |       2 KB |
; FS-Hamfade   | ~22s    |    |     47 KB     98 KB  145 KB |     13 KB      0 KB   13 KB |      47 KB |
; Scroller     | ~69s    |    |    145 KB     50 KB  195 KB |     18 KB    238 KB  256 KB |     122 KB |
; Metaballs    |  15s    |    |      3 KB     61 KB   64 KB |      8 KB      0 KB    8 KB |      10 KB |
;
; Part 1: 21+18+22+69+15 = >145s = >2:23 minutes
;
; Cinco Loco   |  3:50   | 49 |                      111 KB |                        4 KB |      61 KB |
; Cubepan      | ~53s    | 11 |    184 KB     17 KB  201 KB |    115 KB    190 KB  335 KB |     121 KB |
; Sexy Woman   |   9.6s  |  2 |      4 KB     14 KB   18 KB |     ~0 KB      0 KB    0 KB |       4 KB |
; Sacsayhuaman |  76s    | 16 |     61 KB    174 KB  235 KB |     39 KB      0 KB   39 KB |      67 KB |
; Box Zoomer   |   9.6s  |  2 |      2 KB     84 KB   86 KB |     56 KB      0 KB   56 KB |      38 KB |
; SHAM         | ~82s    | 17 |     95 KB    108 KB  203 KB |    117 KB    171 KB  288 KB |     128 KB |
;
; Part 2: 53+9.6+76+9.6+82 = 240s = 4:00 min
;
; One Circle   |  0:14   | 01 |
; Intermission |   15s   | 01 |     48 KB     21 KB   69 KB |      2 KB      0 KB    2 KB |      40 KB |
;
; Green Eggs   |  1:16   | 10 |                      119 KB |                        1 KB |      91 KB |
; Endpart      | 90s-3min|    |      2 KB     53 KB   55 KB |     13 KB      0 KB    8 KB |       7 KB |
;                                                                                                 0 KB free
; 498 KB Chip max, 206 KB for music samples -> 292 KB left absolute max!
; Current Chip max used: 426 KB