“i don’t get it but i also have a suspicion there isn’t really anything to ‘get’” (noby, thumbing down HAM Eager)
“i don’t really know what’s going on here technically, but it looks like a very average and typical ECS demo to me. […]” (noby, piggy on HAMazing)
“proper constructive criticism can be hard to figure out and articulate. imho the master of good criticism for me is actually noby, not gargaj.” (psenough on Demoscene discord)
So here we are again, going deep into the technicalities of this very average and typical OCS demo.
The following text explains a little bit about the techniques used and challenges of writing the Amiga OCS Demo “HAMazing”, released at 68k Inside, Finland, ranked an average 1st place at the Low End Demo compo.
You can download the post-party version (HD launchable) here as ZIP.
Source code is available on GitHub.
While I do not log into Pouet and comment there any longer, I want to thank you for all the positive feedback you gave us on the demo there and also via mail, direct messages and various forums.
Warmly appreciated. Have a free hug.
PS: This is the slightly improved version after some greatly appreciated feedback by ROG_VF.
After HAM Eager I thought people would take up the challenge to come up with more HAM effects in demos, especially after I explained how the effects were made in the first place. There was a lot of room for trying different stuff, and except for Forest 500 by Hackers (that using HAM in a very straight-forward way) I haven’t seen much happening there.
I’m still at the first page, but I think I will be writing a lot. Sometimes, tech stuff can get boring, but I’ll try to make a joke or two, so don’t take things too seriously.
Development of HAMazing started right after GERP 2023 in February '23. Except for some half-finished code and prototyping of the Bulb/Lamp effect, I had no ready effects for it. I did, however, take some code from my older demos and intros during development.
First I started with a list of ideas with over 20 effects on it, albeit not all of them being HAM effects. But I knew I would need some transition effects because HAM stuff usually takes lots of disk space and memory. Hence, you cannot usually keep two big HAM effects in memory at the same time, nor do you want to have black screens while the next effect is loading.
mA2E offered to contribute the musical score early on and I told him he could use about 200 KB for samples. I was lucky he didn’t need as much because otherwise some effects would have run out of memory, albeit I chose to go for the 16:9 320x180 widescreen format again that both saves memory and bandwidth.
Optic was very eager to help, although he usually does his fine pixel artwork with limited palette only. Things became a bit rushed in the end and both code- and graphics-wise – delaying the release a couple of months would have resulted in a completely different, more polished product. And maybe we could have replaced the random photos from my photo library with some really nice artwork by Optic.
There is always a next time (hint! hint!), and I think that HAMazing is still a rather fine demo.
The bootblock is slightly different variant compared to HAM Eager. I had used LZ4 before, but for HAMazing, I fully switched to ZX0 instead of LZ4 and/or Doynax, which is a shame really, given that I had written a state-machine-based LZ4 decruncher for loading and decrunching at the same time. But “better” is always the enemy of “good”.
The tiny (72 bytes!) ZX0 decruncher was written by Emmanuel Marty, making the bootblock a mere 206 bytes to load the compressed framework from disk. I modified the ZX0 decruncher for the framework for speed to about 130 bytes, again around 50% higher performance.
The rest of the bootblock has not changed, you will find more information in the HAM Eager tech write-up.
The framework was originally based on work by Axis/Oxyron published in the Planet Rocklobster framework.
It has been rewritten for HAM Eager and further improved for HAMazing and I will only describe differences.
In fact, it has been modularized in a way that allows the user to switch on and off features as they are required for trackmos, single-part intros, or multi-part file demos (or harddisk installed versions of trackmos).
It has better and more transparent framework interaction macros and some straight-forward functionality can be accessed directly rather than going functions (e.g. many blitter queue function are also available through macros if you know what you’re doing).
In former times, multi-part demos worked by having a private local variable space
accessible relatively to a base register. I used a4 for these purposes while
the framework function and data was accessible through a6, but I always found
this was a waste of a perfectly fine register.
So the new framework uses a6 for both local variables and the framework stuff.
This works by relocating the framework base to a different place in memory on part
switching. It’s been a bit tricky due to list headers and task stack content
still referring to the old base that no longer was holding the current
information. Boy, I was having trouble tracking down these bugs.
While the HAM Eager framework had a hacky way of having at most two background tasks, the multitasking code has been rewritten to support an arbitrary number of tasks and introduces priorities to tasks.
There’s round-robin support for tasks with the same priority should you need it, otherwise higher priority tasks will always get the rest of the frame time first.
If the dynamic memory management is enabled, it also keeps track about the task-specific memory allocation direction so this doesn’t result in race conditions or confusion across tasks.
I’m not sure whether the framework had the two independent regions before already (rather than being chained together on push/pop operations), this anyway worked nicely for the demo. There’s a new function that allows to allocate memory within a 64 KB page and that is actually used once :)
The allocation using the two memory stacks is far from perfect though and at some point I want to have something that works better for sharing stuff between parts.
Now comes with ZX0 support and does in-place decrunching (which was not possible with Doynax).
ZX0 has a much better compression ratio than LZ4 and almost always better than Doynax, while being reasonably fast (according to Leonard about half the speed of the normal LZ4 decruncher).
The custom tool to create the disk image has been refactored and supports multithreading for packing stuff, but otherwise remains mostly unchanged.
This time, I used the loading of files from within a part more extensively.
Here’s the disk layout for HAMazing:
 0:   2048 PlatOS              4934 0/0    8250 |   0 KB CHIP |   8 KB FAST | FAST DATA       ZX0
 1:   6982 Gotham              1679 0/2    2956 |   0 KB CHIP |   2 KB FAST | FAST HUNK CODE  ZX0
 2:   8662 Gotham                32 0/2       0 |   0 KB CHIP |   2 KB FAST | FAST HUNK RELOC
 3:   8694 Gotham              2721 1/2    9912 |   9 KB CHIP |   2 KB FAST | CHIP HUNK DATA  ZX0
 4:  11416 HamTech.smp        17075 0/0   24064 |  23 KB CHIP |   0 KB FAST | CHIP DATA       ZX0 DELTA8
 5:  28492 1st.lsmus           3514 0/0   15940 |   0 KB CHIP |  15 KB FAST | FAST DATA       ZX0
 6:  32006 1st.lsbnk          89312 0/0  159942 | 156 KB CHIP |   0 KB FAST | CHIP DATA       ZX0 DELTA8
 7: 121318 Bulb                4958 0/3   11532 |   0 KB CHIP |  11 KB FAST | FAST HUNK CODE  ZX0
 8: 126276 Bulb                 166 0/3       0 |   0 KB CHIP |  11 KB FAST | FAST HUNK RELOC
 9: 126442 Bulb               21301 1/3   47940 |   0 KB CHIP |  58 KB FAST | FAST HUNK DATA  ZX0
10: 147744 Bulb               43521 2/3   56128 |  54 KB CHIP |  58 KB FAST | CHIP HUNK DATA  ZX0
11: 191266 STHam               4244 0/2   11208 |   0 KB CHIP |  10 KB FAST | FAST HUNK CODE  ZX0
12: 195510 STHam                 38 0/2       0 |   0 KB CHIP |  10 KB FAST | FAST HUNK RELOC
13: 195548 STHam                810 1/2    2760 |   2 KB CHIP |  10 KB FAST | CHIP HUNK DATA  ZX0
14: 196358 HAMphrey.raw       63912 0/0   86400 |  84 KB CHIP |   0 KB FAST | CHIP DATA       ZX0
15: 260270 Kaleidoscope        7118 0/2   19964 |   0 KB CHIP |  19 KB FAST | FAST HUNK CODE  ZX0
16: 267388 Kaleidoscope         360 0/2       0 |   0 KB CHIP |  19 KB FAST | FAST HUNK RELOC
17: 267748 Kaleidoscope      142234 1/2  152148 | 148 KB CHIP |  19 KB FAST | CHIP HUNK DATA  ZX0
18: 409982 Hexagon             2725 0/2    5024 |   0 KB CHIP |   4 KB FAST | FAST HUNK CODE  ZX0
19: 412708 Hexagon               14 0/2       0 |   0 KB CHIP |   4 KB FAST | FAST HUNK RELOC
20: 412722 Hexagon             1425 1/2    4224 |   4 KB CHIP |   4 KB FAST | CHIP HUNK DATA  ZX0
21: 414148 2nd.lsmus           3151 0/0   18669 |   0 KB CHIP |  18 KB FAST | FAST DATA       ZX0
22: 417300 2nd.lsbnk         124810 0/0  176200 | 172 KB CHIP |   0 KB FAST | CHIP DATA       ZX0 DELTA8
23: 542110 Rubbercube          4458 0/2   14592 |   0 KB CHIP |  14 KB FAST | FAST HUNK CODE  ZX0
24: 546568 Rubbercube            20 0/2       0 |   0 KB CHIP |  14 KB FAST | FAST HUNK RELOC
25: 546588 Rubbercube          2023 1/2    4224 |   4 KB CHIP |  14 KB FAST | CHIP HUNK DATA  ZX0
26: 548612 VirgillBars         4620 0/2   10648 |   0 KB CHIP |  10 KB FAST | FAST HUNK CODE  ZX0
27: 553232 VirgillBars           98 0/2       0 |   0 KB CHIP |  10 KB FAST | FAST HUNK RELOC
28: 553330 VirgillBars         5561 1/2   15336 |  14 KB CHIP |  10 KB FAST | CHIP HUNK DATA  ZX0
29: 558892 Blend               9964 0/2   22776 |   0 KB CHIP |  22 KB FAST | FAST HUNK CODE  ZX0
30: 568856 Blend                296 0/2       0 |   0 KB CHIP |  22 KB FAST | FAST HUNK RELOC
31: 569152 Blend              42120 1/2   48836 |  47 KB CHIP |  22 KB FAST | CHIP HUNK DATA  ZX0
32: 611272 cHAMeleon.raw      41405 0/0   43200 |  42 KB CHIP |   0 KB FAST | CHIP DATA       ZX0
33: 652678 Sunset.raw         37580 0/0   43200 |  42 KB CHIP |   0 KB FAST | CHIP DATA       ZX0
34: 690258 Greets1.raw        42331 0/0   43200 |  42 KB CHIP |   0 KB FAST | CHIP DATA       ZX0
35: 732590 Greets2.raw        41665 0/0   43200 |  42 KB CHIP |   0 KB FAST | CHIP DATA       ZX0
36: 774256 Endlogo.raw        26619 0/0   43200 |  42 KB CHIP |   0 KB FAST | CHIP DATA       ZX0
37: 800876 End.lsmus           2705 0/0   12461 |   0 KB CHIP |  12 KB FAST | FAST DATA       ZX0
38: 803582 End.lsbnk          21469 0/0   46764 |  45 KB CHIP |   0 KB FAST | CHIP DATA       ZX0 DELTA8
39: 825052 Endpart             6832 0/2   12388 |   0 KB CHIP |  12 KB FAST | FAST HUNK CODE  ZX0
40: 831884 Endpart               16 0/2       0 |   0 KB CHIP |  12 KB FAST | FAST HUNK RELOC
41: 831900 Endpart              947 1/2    5888 |   5 KB CHIP |  12 KB FAST | CHIP HUNK DATA  ZX0
42: 832848 Screenshots.raw    67327 0/0  129600 | 126 KB CHIP |   0 KB FAST | CHIP DATA       ZX0
43 entries in image 900176 of 901120 used (944 (0 KB) free)
Total size uncompressed: 1352774 (1321 KB)
Not many free bytes left on the disk this time neither. You can see that the compression ratio of HAM images can be really bad (e.g. 42331 bytes packed vs. 43200 bytes unpacked) because they are already packed representations.
“in terms of technological achievement he has a couple of interesting concepts behind it, that only if you’re (like) a dedicated Amiga coding nerd, you really can value the things out of that.” (psenough on HAM Eager)
I explained the HAM mode in HAM Eager in depth already.
Just a short wrap-up: HAM is a hardware compressed display mode where 6 bit are used to lossy express 12 bit colour graphics. The compression works by for each pixel selecting either an “index colour” that behaves like a standard bitmapped 16 colours gfx or by modifying only a red, green or blue component based on the prior pixel.
This means that you normally cannot simply draw graphics onto a HAM screen without messing up the left and right borders which will either show up in the wrong colours because the prior pixels did not have the right colour or bleed past the modified region because the new graphics no longer updates the red, green or blue components as required.
This means:
HAM Eager already proved that this was not quite right.

As with HAM Eager, we want to have something on the screen as soon as possible, even without having music just yet.
I was thinking starting off in a similar way as the Batman Rises demo by Batman Group.
The fictitious city of Gotham also contains the word HAM in it, so that would work as a start. Then, being a silly person, I thought about the 68k Inside Party being held in the town of Hämeenlinna that starts almost with the letters HAM, but at least sounds the same.
I took the anti-aliased blitter line drawing routine from Frustro to create a zooming and rotating HAM text outline. This was done by mid of March.
In April, I came across the Revision Amiga Demo Compo Hype video by psenough who once again mentioned the neglected HAM Eager demo. He tried very hard to explain why HAM is special and used the very cute phrases like “the HAM technology” or “he does everything on the ham”. He has a special place in my heart now, and thus I really liked to give him a place in the demo in return by putting the “done using the HAM technology” sample there. Hugs!
The sample is loaded after the effect has started, then it loads and unpacks the first music, and finally it pre-loads the Bulb effect.
Not much to say about the techniques here. It’s a 4/16 colours display with the texts being four colours so the blending works by simply layering over two times two bitplanes and choosing the right palette.
After the blending between the texts stop, the blitter starts drawing the outlines of the HAM text using an increasingly dense line pattern.
Each blitter line is drawn into two separate bitplanes with different error term, and selecting the right palette is giving the anti-aliased look to it.
Maybe I can use this opportunity to talk about mA2E’s fantastic music. We know he has been a master for excellent chip tunes in the past but full sample based music was not so often heard. He seemed to be afraid of making too big tunes instead of keeping the sizes down. But if you look at the three tunes of 156 KB, 172 KB and 45 KB, this really was not a problem for him. I only gave him a hand with some automated sample conversion and took a little bit care of sample optimization. I hope this helped him focus on his musical merits. I think it worked out wonderfully.
The only thing that was a bit suboptimal from the coder point of view was the use of CIA timing instead of VBL timing. The first music uses 114 bpm, the second 128 bpm, which demanding extra precautions to synchronize the effects to the music, especially because LSP (LightSpeedPlayer) does not carry any potential effect command information over the in the register stream.
The speed of 128 bpm was especially “bad” because it could happen that two invocations of the player could happen within one 50 Hz frame (125 bpm is on par with 50 Hz), thus skipping a musical frame. That made the code sometimes a bit more complicated.
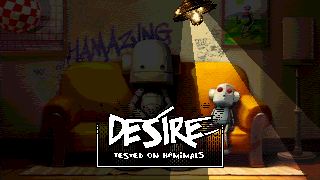
I think this effect was kind of inspired by the swinging bulb in On Fire by Nah-Kolor together with the fact that I wanted to try doing something more with the half-bright HAM mode I developed for the desert cube scene in HAM Eager.
But unlike having just one shadow for something, I wanted to do it the other way round and have two levels of brightness (or darkness) instead. I actually would have liked to have three levels, but this would have made things a lot more complicated. And to be honest, the darkest level would only be a very dark three bit image (8 colours!) and that wouldn’t make much sense.
The shadowing works by having chosen the index colour values in a way that halving the index number also halves the colour value. This allows us to shift both the index colours and the HAM colours down by one or two bitplanes each (halving or quartering their brightness).
Only a couple of weeks ago I found out that Dodke used a similar approach for fading in and out HAM images in Interparallactic in 2015. He uses a grayscale palette for the index colours, so he doesn’t run into the problem of trying to find suitable colours that match the “let’s halve the index and values” problem. Kudos to Dodke for using the approach back then!
The bulb uses this palette, which is far from being grayscale:
    dc.w    $000,$111,$332,$322,$665,$764,$542,$654
    dc.w    $f0f,$ddb,$f0f,$ec9,$f0f,$a85,$f0f,$cb8
So once you have a HAM image with the special index colour layout and values, you can simply take the bitplanes of the original graphics and blit them into different planes to shift the values down. This will halve, quarter or eighth the brightness.
| brightness | plane 1 | plane 2 | plane 3 | plane 4 | plane 5 | plane 6 |
|---|---|---|---|---|---|---|
| full | img pl 1 | img pl 2 | img pl 3 | img pl 4 | img pl 5 | img pl 6 |
| half | img pl 2 | img pl 3 | img pl 4 | clear | img pl 5 | img pl 6 |
| quarter | img pl 3 | img pl 4 | clear | clear | img pl 5 | img pl 6 |
| eighth | img pl 4 | clear | clear | clear | img pl 5 | img pl 6 |
Drawing the trapezoids with two lines each and filling them is not a problem. However, doing a complete full screen blit of the darkest shade then a cookie-cut blit of the brighter shade and yet another one for the normal brightness over the four bitplanes would have not resulted in anything smooth – this is way too slow.
And still that pure cookie-cut blit is additionally missing the fixup to avoid the HAM fringing (a method I already explained a lot for HAM Eager):
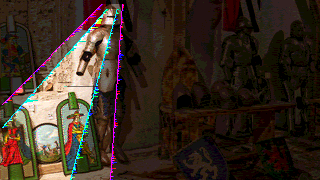
There are four edges that need attention. From left to right these are the edges between quarter to half brightness, half to full, full to half again and half to quarter.
These four lines need to be drawn (in six bitplanes) using four spare index colours each (8, 10, 12, and 14, the unused $f0f slots in the palette above). Due to the way the area blits have been executed (see next section), only two additional lines in exactly one bitplane are actually need to be drawn with the blitter (shifting the index colour of the right side of each light cone from 8 to 10 and 12 to 14 respectively).
These four palette entries need to be changed for every horizontal line to set the colour to the expected true colour value (left to right that would be half, full, again half and quarter brightness).
The colour information is available from the true colour representation that we generated
earlier – we only need to know the corresponding X/Y-positions to access it.
A CPU-based Bresenham algorithm that exactly matches the blitter line drawing,
is used to read out the true colour words ($0RGB)
and places it in a linear buffer in chip-mem. Finally, the blitter is used to copy the data to the
right spots in the copperlist. To obtain the half and quarter brightness levels, we use the
built-in blitter shifting feature and mask the value with $777 and $333 at the same time
at no additional cost (doing this operation (move, lsr, and, move) with the CPU for 700 pixels
would have been too slow!).
Let’s get back to the light cone areas. Our problems are the diagonal lines, where we would have a very large bounding box that would cause a lot of useless drawing if we would go from the start of the line(s) to the end(s).
To avoid this overdrawing, the rays are split into vertical stripes of 32 pixels width (I also tried 16 pixels width, but this causes too much overhead). These are usually tall enough for the blit to be useful. In rare degenerated cases, they might be just a pixel high, but this cannot be avoided.
Then each stripe is scanned from top to bottom to distinguish these cases, where the areas are:
We will also draw the rays as a blitter line, but we will only fill these 32 pixel regions where we need to fill them. Several different cases need to be distinguished here again, especially when filling with FCI (fill-carry-in) because the right line that would start filling the region is not part of the actual block (e.g. this is the case for most of the left hand side line of each cone).
The Amiga could calculate these slices from the ray angles etc. in realtime, sure. However, I decided to calculate the slices offline with a Kotlin program and store the data. So while you might now shout “Animation!!!111oneeleven”, it’s not that we’re streaming the data directly to the blitter.
The completely filled pieces are straight forward copies / clears of the six bitplanes. The other parts would at least need cookie-cut combinations, but I decided to blit the fixup lines directly with the cookie-cut, so these blits become complicated very quickly. For example, the section where all three areas overlap becomes 15 blits for six bitplanes.
Of course, we will only update those areas that have changed between frames (two frames, as we are double buffered).
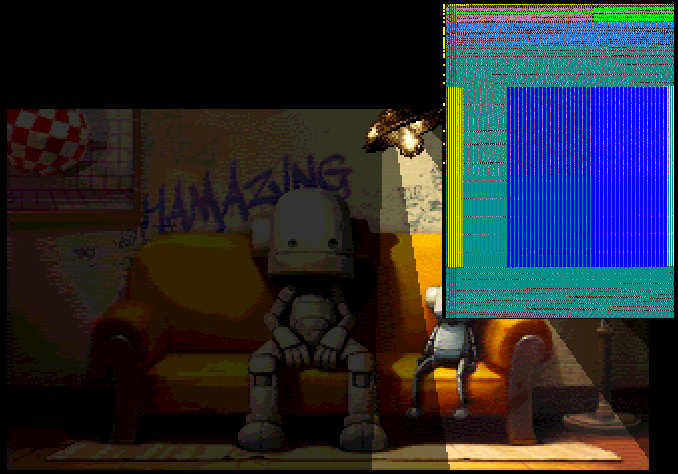
Now this still wasn’t enough to get the framerate to a stable 25 Hz. If we have more or less blits per frame, we can also try to level it out across multiple frames. So we’re calculating up to 12 frames ahead regarding the very complicated blitter queue, so we “just” have to execute it and hope we have enough time left to keep it filled. Given the size of about 6 KB per blitter queue, those 12 frames take already 72 KB of slow mem.
We cannot use copper driven blitter in this case as the copper is busy updating the index colours for the fixup every line.
Moreover, the blits are sorted by size, so that the overhead from the interrupt driven blitter queue is less noticeable and later can go into a synchronized mode without interrupts for the smaller blits.
The blitter queue is also using branching and looping: It doesn’t have to draw and clear the ray lines with separate data, but instead runs the same xor line drawing data twice.
I had been using this random photo from my photo library and an AI generated lamp shade for testing:
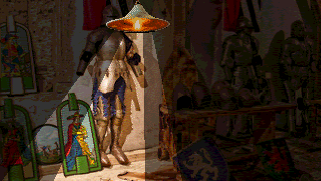
So I approached Optic in February to draw a new lamp shade, and he was happily committed to that. But I wanted moar!
Platon: “I would also love to have some nice background graphics, but I know that you won’t be drawing in true color, so…”
Optic: “Nice… we can do that 🙂 Ignorant question… what is true color?”
Optic created many, many iterations of the sofa & robots picture until he was almost pleased with it. And I really love the results!
Oh, the 41 lamp rotations are calculated at the beginning of the effect (while the eighth brightness screen is scrolling in) using the three-shears method (first time for me). For some silly reason, I intertwined the three shears, so this doesn’t use any extra memory, but I guess this is actually slower than just moving the memory around linearly. We all learn from our mistakes (and this time, it wasn’t mission-critical).
Normally, one would need to use sprite chaining to get both the lamp and the text sprites onto the screen. But we cannot place the text sprite data in memory directly behind each lamp rotation. To avoid blitting the current lamp rotation to a static buffer, the sprite pointers and control words are reloaded one word per line downwards so that the sprites with the texts don’t need to be chained to the lamp.
Both the lamp and the text sprites share the upper 15 colours. To avoid the text sprites taking away too many of the colours, the sprites use the attached bit, so they only use the colours 17, 19, 20 and 28 instead of allocating four sets of two colours (except for the 68k inside logo, that needs an extra pink tone that is being swapped out using the copper).
At the end of the main part, the cones of light are enlarged to the whole screen and HAM fades to white to make the whole goodness of Optic’s artwork visible. The fade to white uses the same shade bobs techniques as the Full Screen HAM Fade in HAM Eager.
So we have the original graphics taking 42 KB of memory, double buffered display screen (84 KB), two bitplanes for the ray lines, two more for the filled rays (28 KB), 33 KB for the lamp rotations, the text sprite graphics, some more buffers for the ahead calculation of the fixup lines, the copperlists etc. and end up around 230 KB of chip mem used. When you add the music with 156 KB, not so much is left really.
Slow ram is mainly occupied by the true color representation (113 KB) and ahead of time blitter queue data.
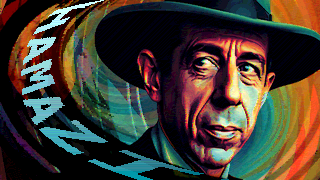
This part was originally planned to show the title of the demo and use both sliced ham and temporal (spatial) dithering to have the highest possible fidelity. The spatial dithering switches the screen between two slightly different images every frame. This effectively increases the colour depth from 4096 (12 bit) possible colours to 32K (15 bit) colours.
Note that spatial dithering is not the same as interlacing. Interlace doubles the vertical resolution by using short/long frames with half a vertical pixel offset. Spatial dithering tries to increase the colour depth (resolution) by alternating between colours fast enough (especially CRT phosphor screens it creates a mix of the colours) that the perceptible colour is an average mix of those. The YouTube captures don’t do this any good. If you want to see the quality of the image in emulation, and your monitor refreshes at 60 Hz, try setting the frame rate to 60 Hz instead in WinUAE.
The image needs twice as much data in memory, but fortunately, not twice as much space on disk because the lines are rather similar.
My HAM converter program uses an experimental dithering that should be better suited for HAM images and especially for this temporal dithering.
The part was also inspired by the C64 demo The Shores of Reflection by Shape where they had a scroller going in a bend.
When I added the scroller that consists of sprites that are moved in X direction on (almost) every line, it became clear that these sprite updates together with scroller gradient updates would actually limit the use of sliced ham (where the index palette is also changed on every line), so in the end, only normal HAM mode was used. The results, especially on a real CRT, are still quite remarkable.

I wanted to write my first table based effect (similar to the fantastic scroller in Colombia) but when I did the math, it soon was clear that I could not render the scroller with the CPU all the way through. And whenever I run out of ideas, I think about how the blitter could help instead.
I came up with something that both tries to keep the illusion of rotation and was simple enough. The scroller therefore uses an innovative way (IMHO) of shrinking the scrolltext while scrolling upwards. It starts out at four times the normal width (128 pixels), and the letters of the font are already skewed by 50% in vertical direction. Two letters are or’ed together per horizontal line as they overlap due to the skew.
While moving upwards the blitter moves a few selected pixels in every row one or two pixels leftwards, effectively shrinking the graphics. This is done with a combining blit and using two masks for pixels that are shifted by one pixel left and another one where pixels are shifted by two pixels left.
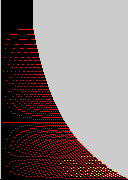
Maybe this image makes it clearer: The red pixels are those that are being shifted left by one pixel every step and the yellow ones are those who move two pixels to the left. This results in the letters ending up at exactly 1:1 pixel resolution once they arrive at the top section. Notice that the yellow dots only turn up at a certain place in the image, so this second blit with the two pixel offset can be optimized.
This is enough to shrink the font back to original width while it travels upwards. Together with the repositioning of the sprites using the copper, this gives an impression of rotation (but it’s missing the skew in Y direction which can be noticed when the bend goes right at the top).
Notice that this shrinking thing only works perfectly as long as at least one of the original pixels is still visible. It cannot restore lost pixels, so if I would be doing this to shrink more, the visuals would start degrading (like in a bad Star Wars scroller).
The CPU is mostly idle in this part. The blitting of the scroller to the sprite data isn’t even optimized. I wanted to have the scroller re-enter the screen and do some table effect for it to disperse into some void (e.g. Hamphrey’s ear), but Optic changed the image a week before the party and the hat would protect Hamphrey from all scrollers trying to reach his ear.

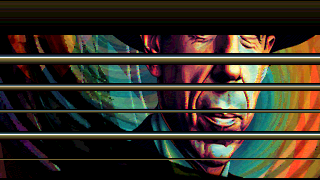
I find it hard to find good ways to introduce a picture that are not just standard and boring. The dropping bars with physical collision detection and with color gradients in the empty spaces was a compromise that was possible without having to have a true colour representation of the image in memory.
Although the copper “simply” turns off display DMA between the bars, it is still an effort to create a copperlist that handles all cases correctly.
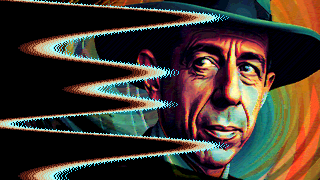
The outro transition effect is similar to the one used in HAM Eager, but uses more sprites. As before, it uses a huge copperlist to display a big carpet of sprites that are repositioned all the time to cover the screen. 180 blits of more than 350 pre-generated lines are necessary per frame.
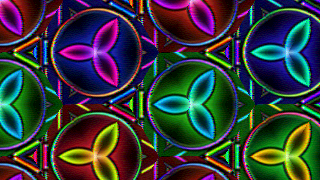
Ever since I watched Rule 30 by Andromeda, I wanted to recreate the kaleidoscope effect in HAM. This especially tricky because you have a lot of pieces that need HAM colour fixing, and you need to have a several textures in memory.
In Rule 30, the textures consisted of some random vector shapes that could be rendered as rotated (and mirrored) versions at runtime (I think the demo used 8 colors for the shapes).
Realtime rotation of HAM graphics? This is nothing you can do with HAM so easily. So I calculated: Let’s have three rotated textures of 256x256 pixels each, that means I need a true colour representation of 3 * 256 * 256 = 196608 pixels. That should fit easily into slow ram, right?
Only much later I noticed I had forgotten that each pixel takes two bytes in true colour representation. That’s 384 KB of ram now! A LOT of ram! Panic immanent!
The pieces of the kaleidoscope are put together by triangles, and six triangles are forming a hexagonal shape. I chose a width of 64 pixels for the length of the triangle, thus the perfect height should be about 55.425 pixels. With a screen height of 180 pixels, this would allow about 3.27 triangles vertically. So I reduced the height slightly to 53 pixels (3.4 triangles on screen) which would also give me the little extra speed for the blitting and fixup calculation that I would need later on when I added the five more tint permutations.
Yes, I know it slightly skews the symmetry, but this is hardly noticeable.
If you look at this diagram, you can see that we will have 10 slanted lines that form the edges of each triangle.
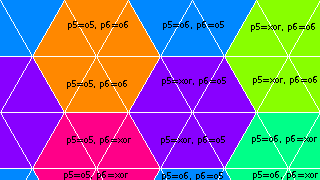
Some of them will have the same colours, because the blue and violet hexagons are partly repeating. That still leaves us with nine slanted lines plus a vertical line at the left screen border that we need to fix using index colours.
This theoretically leaves us with five index colours for the texture that we could utilize for less blurry edges. Unfortunately (?), we want to even have more colours on the screen, without having more textures.
If you remember HAM Eager, there was this greeting part where there were bars moving around, colouring the lemur image in different tints. This worked by permuting the red, green and blue components – achieved for the HAM modifying colours by swapping the HAM selection bitplanes 5 and 6 or using an xor’ed version of both planes (that’s what’s marked in the image above).
In HAM Eager it worked nicely for the sliced ham image on a line-to-line basis because the copper would also reload the index colours with the correct permutation for every line.
However, here we would require to change the index colours mid-line for every hexagon and thus: no can do.
So our texture may not use index colours at all. This leads to a bit of visual deterioration on hard edges (so if noby refers to this as “more care in little details like the seams in the kaleidoscope effect”, well, I cannot change the laws of HAM, not even for demanding PC sceners).
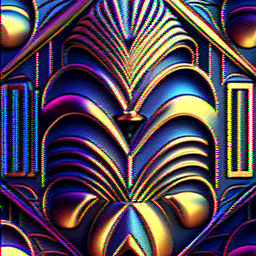
So Optic’s fantastic texture
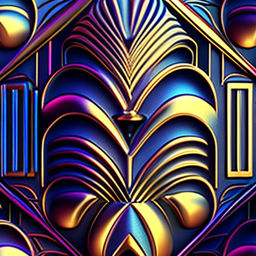
turns into this when converted to HAM without the use of index colours:
Still, this gives us the opportunity to have six different tints of the same texture as displayed in the graphics above. I do not know how, but this Optic’s converted HAM texture contains over 4000 colours of possible 4096.
The triangles are cut out of the three textures from the right positions and placed into the first top line. For the lower half of the hexagon in the top line, the blitter is used to flip the textures vertically.
The copper is then used to mirror the graphics and replace some of the p5/p6 plane data with different variations. This is unfortunately not very straight-forward and takes some thinking (and extra blitting) to work for the six differently tinted hexagons.
In the end, the fully fledged effect with six tints only barely fits into two frames (running at 25 Hz). But it does and that was the aim.
As always, some tricks were necessary.
For each left edge of a triangle, we need to obtain the correct true colour information from the texture. We use speed code here that will extract the line going straight down (left edge), slanted to the left or to the right, to write these colours to a linear buffer. Of course, we cannot store the true colour textures in six versions, so we use the blitter to perform the permutation (e.g. RGB->BGR) for the fix-up line colours where necessary – the CPU would not be fast enough.
The blitter copies the resulting colours directly into copperlist for each vertical section. We have four sections with each up to ten fixup-lines, 1800 copper colour changes in total.
It’s a lot of effort to get working. Is there an alternative? Well, if you just used the 7-bitplanes trick with a fixed RGBG pattern one could have easily avoided all the hassle of the fixups. Instead of one big 256*768 pixel texture with six bitplanes (144 KB), one would have to have four of them with four bitplanes (384 KB).
The horizontal fidelity would, however, become much worse (more like 2-4 pixels). I’m tempted to try this one day, just to see, how shitty it really looks.
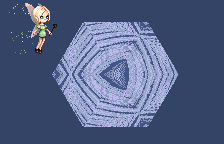
Calculating the true colour representation of the texture takes about four to five seconds with nothing else going on. That’s a long time we cannot let the viewer wait in darkness before we can show something.
Instead, the effect starts with a poor-man’s version of the kaleidoscope without HAM, using the planes 5 and 6 to get something that resembles the original pattern. That gives us enough time for background calculation and is a fine build up to the full screen effect.
A fairy flies in and turns the kaleidoscope colourful. Easy! It was my first use of spline interpolation using the Bernstein polynomials.
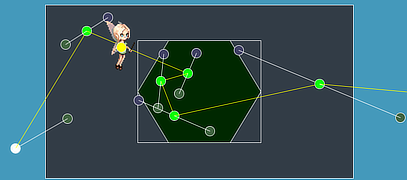
Except for “opening the border” to be able to have the fairy sprite visible even though
the bitplane DMA has not yet begun (by hitting bpl1dat), the copperlist is quite straight-forward.
It gets a bit more complicated when it starts filling the top part with the HAM one and
the bottom remaining low-color especially across the mirroring point.
After the fairy sprite has left the screen (the post-party version uses some layers of composition to get the particles into the sprite), the HAM kaleidoscope is dissolved using an increasingly noisy pattern.
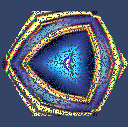
Of course, you cannot just paint over some random pattern and hope it will not corrupt the HAM graphics underneath. So it again is a sprite of 128 pixels width using the background colour for its pixels.
The same technique is used to introduce the full screen kaleidoscope, but of course, a single 128 pixels wide sprite will only cover a part of the 320 pixels wide screen. Thus, a large copperlist is used to move the sprite positions across the screen, making it repeat 2.5 times. As the sprite consists of noise, the repeating pattern is not noticeable.
The post-party version has mouse control where you can actually move the kaleidoscope texture yourself with the mouse. Try it!
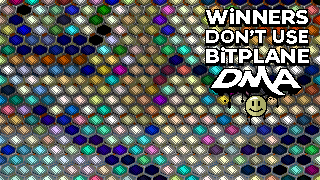
That part was simply a filler effect. The kaleidoscope used up almost all memory (both slow mem and chip mem), so I needed something to pass the time while the music for the second part would was loaded from disk.
I had this experimental effect lying on my harddrive for a very long time. It uses a large copperlist for copper chunky in extra-half-bright mode, but instead of wasting DMA time for the display of six bitplanes and without using the 7-bitplane trick to just use DMA for four bitplanes, it simply turns off the whole display DMA.
But without display DMA there would be nothing displayed, right? Fortunately, we can also
hammer bpl1dat using the copper. Writing bpl1dat (which always happens last in the cycle diagram
for bitplane DMA) will the force the hardware to output whatever is in the bitplane data registers.
Otherwise, the screen would stay blank.
We can manually load the other bpl2dat to bpl6dat at the beginning of each line and because
nobody will overwrite it, it will simply repeat the same pattern every 16 pixels all over the screen.
As nothing is occupying the DMA slots, we can alternate writing bpl1dat and a register
of the colour palette (the same one over the whole screen) 20 times.
This way we get a 320 pixel wide copper chunky display where the “dots” are 16 pixels wide
and allow the use of a half-bright version of this colour for free.
And every second DMA slot is still available for the CPU or the blitter. The next image shows the WinUAE DMA debugger; notice there are is no blue paint for bitplane DMA, only the yellow cycles that are occupied by the copper.
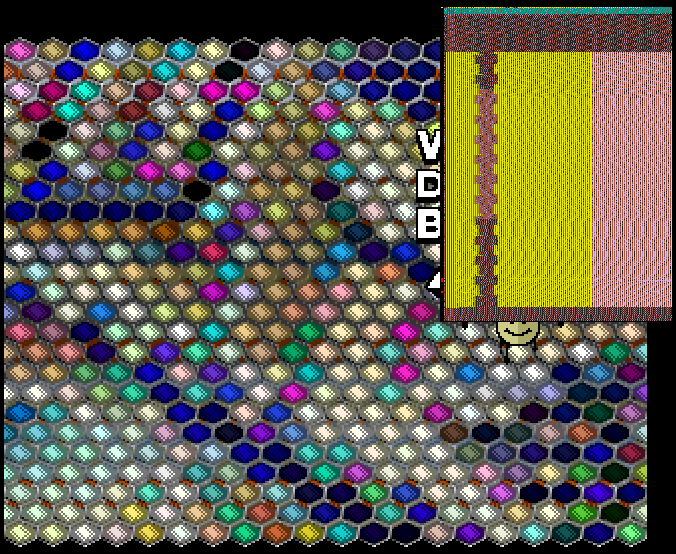
The copperlist uses the normal looping technique and an alternating eight pixel offset.
I’m not aware of anyone having made use of this technique before, hence the sprite mocks a bit the lack of bitplane DMA in this part. This new ‘screenmode’ comes with its own set of restrictions, but I have a few ideas what do with it.
The copper chunky is filled with a Rotozoomer effect which is not as efficient as it could be because it is using a texture mapping core loop instead of something more clever (it is still using only little frame time due to the low resolution of 22*25 pixels).
It’s my first Rotozoomer on the Amiga (the other one was on a circular LED disc with 255 LEDs).
I chose rotozooming because I could use a texture from the kaleidoscope effect that
was still in memory and the blitter could invert it (xor with $fff) for free while
copying the colours to the copperlist.
It’s the only part that’s not in 16:9 320x180 widescreen format, as the pixels are chunky enough already.
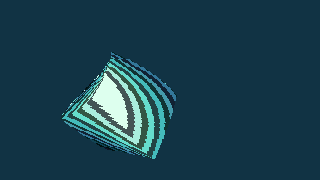
When the next banger music by mA2E starts, we need something for the viewer to get used to it first. Having the HAM bars right away would feel a bit strange. Again a filler effect is required and moreover, to have the next part line up with the cat “meow!” cue.
The Gouraud filled cube routine was developed for G. Rowdy and only slightly modified for 16 colours.
It still uses a combination of blitter line drawing for the inner (colour banding) lines and CPU line drawing for the outer lines. The palette is ordered in a way that exactly one line needs to be drawn to switch from one gradient to the next (Gray code).
The cube is smaller here (128x128 pixels) than in G. Rowdy (172x172) to be able to store 33 buffers of it in memory (264 KB). The copperlist changes the displayed buffer every four pixels giving it a rubber-like effect. There is nothing fancy happening here and the effect is certainly not as bleeding edge as it was in G. Rowdy.
I wanted to have a different object than a cube, but… time…
Last October Virgill and I were talking about great demo effects, and he said that he loved the rotating bars in Sanity’s Interference and demanded that I should do something like that. So thanks, Virgill!
Of course, it needed to be HAM.
In Interference, the effect works by having one (!) very wiiiide line, scaled according to the cotangent of the rotation angle and skewing it horizontally with the copper every display line down. Unfortunately, this cotangent goes to infinity very fast, the closer you get to 90° rotation angle, and you would need to do different tricks here to get a full rotation. Not impossible though. Maybe next time.
For these HAM bars, we will need to draw that wide line from 12 bit true colour information. However, 12 bit data sucks to be processed with the CPU, e.g. for summing values. 24 bits per pen are better suited, but still will take away precious CPU cycles when there is the need to saturate.
And as always, if the CPU is too slow, we will try to make use of the blitter instead. For the Romantic Getaway copper chunky display I developed a routine that stored the R/G/B component in a word each (48 bit per pixel) The CPU can add values together normally without taking care of overflowing the 8 bits. Even slightly faster long word operations are possible that way.
Then the blitter is magically used to saturate the values to 255 (this only works for values from 255 to 767, but this is usually enough – you might spot a frame where the saturation fails in the demo because all the bars meet at one point).
You may want me to explain how I did it, but try it as homework instead. Hint: The blitter is running in filling mode.
In the next step the blitter merges the three 24 bit components back to a 12 bit RGB value. It is a bit more complicated than using the CPU, but it certainly is faster.
Moreover, the blitter can fill the component buffers with a starting pattern. In HAMazing, this is used to create a dithering pattern that changes over time. This pattern is based on the solutions in Sudoku, because I wanted a 3x3 pattern (that corresponds better to R/G/B values) than the normal ordered dither 2x2 or 4x4 patterns. The Sudoku numbers are well-balanced.
Now that we have a line of true colour data, we need to convert this to HAM pixels, choosing the optimal pen. Optimal means that it will pick the right component if only one component had changed between the current and the prior pixel (generating a perfect pixel match) or the R, G, or B component that has the most delta (generating a close match). It is not hard to generate HAM colours using a simple alternating R/G/B approach, but choosing the best pen clearly is. While it would have been possible to integrate picking index colours, too (like in the desert scene in HAM Eager), this does not seem to be necessary here due to the smooth gradients.
The algorithm uses a couple of rather small tables and a larger one to assist the decision-making process. Think about ways yourself on how to figure out if none, one, two or all components of a 12 bit RGB value have changed. Can you come up with something efficient that can be stored in a table?
For the completely vertical bars in the beginning of the part with a width of 320 pixels, this algorithm would be fast enough for running at 50 Hz, but I rather kept it all at 25 Hz and be able to pre-generate some data in the background instead.
For the rotation of the seven bars, the displayed line is 1024 pixels wide in memory, but only 512 pixels are updated with the HAM colours. Having more HAM pixels would slow down things too much to keep the effect at 25 Hz.
The rotation is done by moving the very same HAM line every screen line more and more to the left or right, depending on the angle. At the same time and with increasing angle, every bar needs to be scaled up to remain at the right proportion. This scaling could of course be done after the HAM pixel calculation, but then we would get less smooth gradients, bad dithering artefacts and generally worse HAM artefacts.
So instead each gradient bar of light is scaled first and then added to the true colour line.
Actually, during rotation the bars are no longer runtime-calculated linear
interpolated true colour pixels, but the data is directly added with optimized
add.l loops from precalculated bars of 64 to 127 pixel width.
Wider bars than 127 pixels will be using double sized pixels, but this usually has no bad visual impact.
The rotation is updated at 50 Hz while the HAM pixels are updated only at 25 Hz.
This still gives a pretty fluid effect. To update the shearing, the modulo and
necessary horizontal scroll values (bplcon1) are precalculated during the first part of the effect.
They then only need to be blitted into the copperlist.
We haven’t been talking about the left hand side border yet. Of course, we would get HAM artifacts, if we are shifting the line out of the screen. We cannot, however, modify the bitmap graphics to fix this via an index colour unlike we did in other effects.
Why? Because we are using the same line all over the whole screen. We would run out of index colours quickly if we had to add a dot of an index colour for every shifted horizontal position.
No can do with the old approach.
However, there is one little trick up my sleeve that I didn’t use before. Of course, it broke the WinUAE emulation until I told Toni Wilen about it (thanks for fixing it, Toni!).
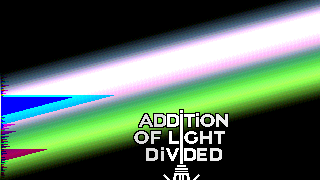
Thus, if 42Bastian writes “Great piece despite the small gliches.” (sic! it’s fun to add a glitch to the actual word), this is most likely due to looking at one of the several broken YouTube captures (see above) or using an old WinUAE version (it’s not that the demo is completely free of glitches, but they are not as visible compared to the broken encodes). Thanks to Mop for doing correct encodes!
Come on, what’s the trick? When you use the copper to change a colour value, the change comes actually one pixel early (on OCS/ECS) and not on the expected 8 pixel boundary. This was annoying in Romantic Getaway, where I wanted the colour changes to be aligned with the 8x8 pixel graphics, so I scrolled the whole screen one pixel to the left to match.
Hence, the copper comes early and Denise doesn’t even object! How can this help us fix our HAM problem?
Well, the HAM colours are affected by the prior pixel, no matter what colour it is. So if we change the background colour one pixel before the display starts, this will be setting the start of the HAM pixel calculation for all following R/G/B modifying pixels of whatever comes first in the display – without us needing to modify the actual bitplane data! To avoid the background colour being used once the display area starts and thus making the fixup line wider than merely a pixel, colour 0 is not used at all inside in the active graphics area, but simply another black index colour instead. We need to restore the black background colour before the raster beam leaves the right border of our display, but that’s not a problem, we can actually do this immediately.
When discussing the HAM bars, I wanted a “I can haz cheezburgers?” meme-like overlay.
Optic suggested: “ok… random open mouth cat meme - but with a pig” to which I replied: “I don’t want a pig. Pigs don’t win competitions. Cats do.”
And I suggested something like this one:
![]()
(Fun fact: This image uses the colours $fed and $ca7 ;) )
So he came up with this funny little cat:

And finally, when mA2E tried to find a replacement for a “Woooh!” sample, Optic suggested a “Meow!” and obviously this stuck. Now I had to synchronize the break in the music with the visual cue of the cat.
There was another picture of a cat in the demo, alas it got replaced by the cHAMeleon.
So yes, maybe cats do win competitions ;)
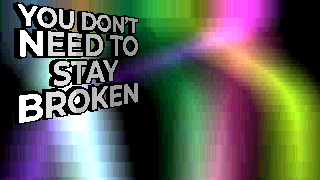
So we got several nice overlays drawn by Optic here, and they texts are from a song by Tori Amos called Addition of Light Divided that I had in my head the other day.
The lyrics appealed to me not only because the title was literally what was happening in this effect but also describes how many people felt during the never-ending Corona lockdowns and measures.
She said, "I am hurt"
Love is lost and frozen
Pray that I don't stay
Feeling broken
Feeling broken

I woke up in an aqua
Tourmaline dream
I woke up in an aqua
Tourmaline dream

Let the light break through
You don't need to stay broken
Break this chain of pain
You don't want to stay broken
You don't want to stay broken
[...]
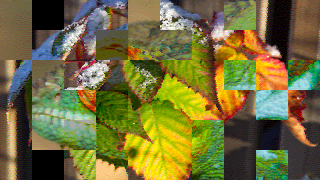
How far can you go with image manipulation and blitting on HAM images?
The mostly unknown (and IMHO vastly underrated) Shuffling Around the Christmas Tree, an interactive puzzle, took HAM images and sliced, moved and shuffled them around without any fringing.
This part is a reprise of some of those effects and has some new ones.
It first starts by fading in blocks in columns and rows of a HAM image. It works primarily like the HAM fade algorithms I had in the Full Screen Fade in HAM Eager with the left edge correction using an index colour like in Shuffling (so the copperlist is updating one colour every 32 pixels).
However, you need to fade in the other index colours as well. But what are going to do with the next block in the same line? You cannot fade in the colours because they will affect the existing image.
This can be solved by using only half the index colours (1 - 7) for the normal image and colours 9 to 15 while fading in a block. Colour 8 is used as an index colour fixup for the left edge of every 32 pixel wide block. This means, there can be only one block per row at the same time that’s being faded in, but this goes so fast anyway, that nobody will notice this restriction.
A background task is loading and decrunching both the cHAMeleon and the sunset image while the blend in effect is running and creates a true colour representation for each.
Then the cHAMeleon image is slowly replacing the leaves in by first fading a block back to black and then fading in the new image. To make this work, both (all) images must share the same index colours (I just took the five true colour images, placed them underneath in a tall canvas and converted them to HAM all together and then sliced the binary apart again).
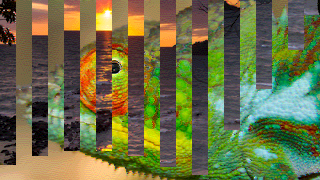
This is very similar to the effect in Shuffling but keeping the old image intact when the bars bounce up again (instead of having a black background).
The images are sliced into 16 pixel wide bars that all start with a fixup index colour at the left edge, removing all the fringes if the copperlist is updated in the correct way. The left edge is generated on the fly, we don’t have enough memory left to destroy the original image with these lines because we will need the unmodified images later on.
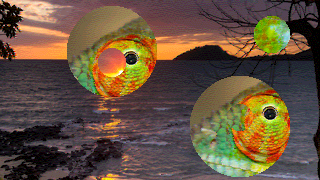
I wanted arbitrary shaped blitting, but the shape had to be convex and scale nicely. Now that I think of it, hexagons would have been also possible, but well, I used filled circles instead.
Blitting the circles with the contents of a different HAM image could be pretty straight-forward. But I wanted the blitting process to be optimal. There will always be a possibility to place a maximum sized square inside a circle, which means that this part could be blitted without having to do cookie-cutting, skipping the need to have a mask and the original data that would be fully overwritten by the blitted image.
Note that due to the fact that blits are always a multiple of 16 pixels, the optimal inner area is usually not a square rather than a rectangle.
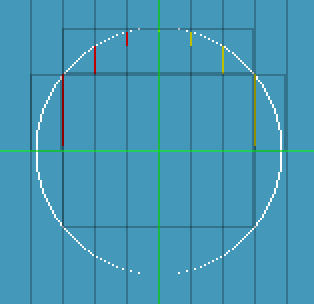
For fastest blitting, the mask of each circle is stored in memory. However, storing a full mask of the circle with the inner area (that we don’t need anyway) is wasteful, and we are already running low on memory.
For 48 circles (from radius 3 to 50) we’re only storing the top portion and the left and right portions outside the inner rectangle. We don’t need to store the bottom portion because it is symmetrical and the blitter can just flip the mask using negative modulos.
(I had this for the left and right parts, too, but it turned out that twice as many blits for the left/right portions would cause so much overhead that it was not worth the few bytes saved. But it was still cool to have blits for some time that only changed one modulo value and started the blit again without touching any source/target pointers!)
That way, the runtime-generated masks of the circles take slightly more than 10 KB, which is acceptable. The circle outlines are drawn using Jesko’s method, which is a little bit faster than the standard Bresenham midpoint algorithm, but this is not mission-critical here at all. Still nice to have “bleeding edge” algorithms.
Not only the masks are generated at runtime, but also speedcode for each circle
Again a reminder why we do need the HAM fixup: This is how the effect would look like without fixing the rims of the circles:
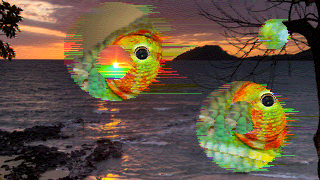
Each circle needs two fixups on the left and right sides as usually. Because our images use 7 index colours (9 - 15), we have the colours 1/2, 3/4, 5/6 and 7/8 free to be used as HAM fixups (actually colour 8 is also used in every image to load the first pixel of every line for better image quality). This means that we can have up to four circles (or parts of the circle) on the same horizontal line at the same time.
The circle effect part is the only part that runs at variable framerate, from 50 Hz, 25 Hz even down to 16 Hz sometimes, when there is much happening on the screen. It is smoother on AGA machines (almost all the time at 50 Hz) due to faster CPU and increased display bandwidth.
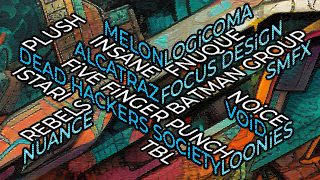
The most interesting thing about the greetings section is probably the memory management (and maybe the scripting, but that’s actually just some work but nothing tricky).
Remember we only have space for three original HAM images at a time. Once the first image with the leaves is no longer needed and all other true colour images have been calculated, the demo loads in the first greetings page from disk, decrunches it and starts the true colour data calculation, which takes a bit more time because the CPU is rather busy during the effects.
Once the last circle with the cHAMeleon has vanished, it triggers loading the second greetings page to the cHAMeleon buffer, decrunches it and again starts the true colour conversion. There should be plenty of time for that really.

We want to display the Desire logo right after the greetings, but where do we load it to? All three buffers are in use!
We need the sunset image as long as there is still a greeting circle animating, but after those are gone, the buffer is free, so we trigger disk loading right then. There is just a second or two before the music runs out to the cue where the logo should be displayed. You have to hope that there is no read error on your disk or otherwise the timing for loading and decrunching will not hold up.
The Desire logo is faded in from white and fades out to black only in the post-party version. Why not in the party version? Because silly me asked Optic for a logo only two days before the deadline (as we wanted to have the second tune to end on a “Meow!” after mA2E wrote the end scroller tune just a couple of days earlier). He asked me about the restrictions for the logo and I said “No restrictions!”. In the meanwhile I had used a 32 colours placeholder logo.
Optic delivered the logo Friday evening… and of course it was true colour! So that’s on me! I had to kick the normal palette fades and was unable to add the necessary HAM fading on such short notice (sauna is more important!).
Saturday morning, at 9am, Optic delivered an updated logo which the nice bluish background. Uh oh. There was only 13 KB free disk space left after adding putting in the HAM logo the night before…
And after HAM conversion, 4.5 KB of disk space was missing for it to fit. I really tried to stay calm… Trying out all the different error diffusion dither methods I had built into my converter (and there were plenty!) to see, if it would make a difference, but I just couldn’t get the missing 2 KB out of it.
In the end, I chose ordered dithering and that finally compressed the image down well enough to fit on the disk.
So we are able to store three original HAM images in memory – that consumes 127 KB of chip mem. We need additional two buffers in chip memory of 42 KB each to display the gfx and awfully big copperlists of around 25 KB (?) each and the circle masks (10 KB). So about 234 KB in total.
The true colour representation of three images will take 338 KB of slow memory, then there’s 62 KB of speedcode generated, circle meta-data, some other stuff and in the end you’re sitting there with the requirement of 426 KB slow mem. Uh oh.
During test runs, the framework reported that it was down to less than 7 KB of free slow memory. That didn’t sound so good, because the framework (currently) does not claim all slow memory but just the largest free block at boot time. It worked with Kick 1.3, but Kick 2.0 needs more memory… and of course, it failed there.
I was able to get it working by moving some of the allocations to chip memory (there was about 50 KB free there) and it started working again on Kick 2.0. It doesn’t work on 512+512 KB machines with Kick 3.x, but seriously, who has such a machine?
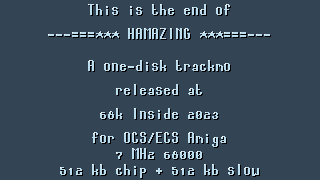
I had a completely different ending in mind but time ran out. Having the background images scroll up was just a quick hack and not much love went into this part (sorry).
For most purposes, I still was using KingCon, although it spills out asm sourcecode with spaces
between the numbers. Moreover, the sprite format is useless if you want to do sprite chaining.
For the HAM pictures, I had my own converter.
For ZX0 compression I used Salvador rather than the much slower optimal ZX0 compressor.
To reorganise, extract or merge binary data, I wrote a tool called juggler that is
script driven. I plan to extend its functionality later on – maybe I can add the features
of KingCon there, but that would need some external image loading library.
For development, I used CLion with my
MC68000 assembly language plugin
but in an extended version that tries to do some formatting but doesn’t work quite acceptable right now.
The Jetbrains APIs and documentation are just a pain.
I only ran the WinUAE emulator within in a virtual machine on my Mac, but also vAmiga for testing.
Not much more to say really. That’s it, I hope you got some insight into how this very average demo works and could enjoy it a couple of times.
Best regards,
Chris ‘platon42’ Hodges, chrisly(at)platon42.de
Not all of the information may be accurate as I stopped updating it at some point, but it really helped me plan things out.
| Partname | Runtime | Pt | Chip Hunk | Dynamic | = Total | Fast Hunk | Dynamic | = Total | Disk Space | LOC |
|---|---|---|---|---|---|---|---|---|---|---|
| Gotham | 0:13.5 | – | 9 KB | 28 KB | 37 KB | 3 KB | 16 KB | 19 KB | 4+17 KB | 1200 |
| Music 1 | 2:35 | 19 | 156 KB | 15 KB | 91 KB | |||||
| Bulb | 0:59 | 0 | 54 KB | 177 KB | 231 KB | 58 KB | 194 KB | 252 KB | 59 KB | 3700 |
| STHam | 0:28 | 7 | 87 KB | 93 KB | 180 KB | 9 KB | 0 KB | 9 KB | 70 KB | 1800 |
| Kaleidoscope | 0:54 | 10.5 | 148 KB | 143 KB | 291 KB | 19 KB | 394 KB | 413 KB | 150 KB | 6400 |
| Hexagon | 0:13 | 17.5 | 4 KB | <64 KB | <68 KB | 5 KB | 18 KB | 23 KB | 4 KB | 900 |
| Music 2 | 2:35 | 21 | 172 KB | 22 KB | 123 KB | |||||
| Rubbercube | 0:24 | 0 | 0 KB | 291 KB | 291 KB | 11 KB | 44 KB | 55 KB | 5 KB | 3000 |
| Virgillbars | 0:52 | 4 | 15 KB | 204 KB | 208 KB | 11 KB | 244 KB | 255 KB | 14 KB | 3300 |
| Blend | 1:15 | 11 | 43 KB | 192 KB | 234 KB | 25 KB | 401 KB | 426 KB | 50+xx KB | 5800 |
| Music 3 | 1:45 | 14 | 45 KB | 12 KB | 24 KB | |||||
| Endpart | 0 | 5 KB | 159 KB | 164 KB | 2 KB | 2 KB | 4 KB | 3 KB | 900 |